Exchange 2007 Mail Flow - How It Works
Exchange 2007 uses AD Sites and Services site links to get a network topology of the environment. By default Exchange 2007 will use the route with the lowest amount of site hops with the lowest site link cost.

In this diagram there are 4 ways to get from Site1 to Site3.
Site1 -> Site2 -> Site3 = Cost 20
Site1 -> Site4 > Site3 = Cost 25
Site1 -> Site2 -> Site4 -> Site3 = Cost 31
Site1 -> Site4 -> Site2 -> Site3 = Cost 16
Site1 -> Site4 -> Site2 -> Site3 provides the lowest cost however exchange 2007 will use the path of the least hops with lowest cost... which in this case is Site1 -> Site2 -> Site3. Additionally when messages are relayed from Site1 -> Site2 -> Site3, messages will not hit Site2 hub transport server, it will just use the subnet information in sites and services to send it in that direction. This is because if Site2 hub transport had to receive every email that comes through, it would use extra processing.
What if Site2 was responsible for spam filtering and you wanted email going from Site1 -> Site2 -> Site3 to actually pass through Site2's hub transport server?
This can be done by setting Site2 as a "Hub Site" by using the Set-ADSite command. This means that all messages flow along this journey must stop in site2 before being relayed on.
What if an exchange administrators wanted to to setup email replication different to active directory sites and services replication?
If you are not happy with the site link costs in AD, instead of updating sites and services you can use the powershell command Set-ADSiteLink to set new costs to that site link for exchange. This does not modify the value in sites and services. It only effects exchange. Whenever an exchange site link cost is specified, it will use this instead of the site link cost specified in AD Sites and Services. Very handy if you want mail to flow in a different direction to your AD replication.

We want to get messages flowing from Site1 -> Site2 -> Site3, and not Site1 -> SIte3. We do not want to modify active directory site links. What needs to be done?
Answer
To perform this we need to do 2 things:
- First make site2 a "hub site" by using the Set-ADSite cmdlet.
- Second use the Set-ADSiteLink on the site1-site3 sitelink and make it a value of 5 or higher.
Conclusion
Provided your Active Directory Sites and Services is setup correctly in regards to site links and costs to reflect your physical network infrastructure, this should give you all the knowledge you need when it comes to the Exchange 2007 site to ensure your messages flow throughout your organisation efficiently and effectively.
In this diagram there are 4 ways to get from Site1 to Site3.
Site1 -> Site2 -> Site3 = Cost 20
Site1 -> Site4 > Site3 = Cost 25
Site1 -> Site2 -> Site4 -> Site3 = Cost 31
Site1 -> Site4 -> Site2 -> Site3 = Cost 16
Site1 -> Site4 -> Site2 -> Site3 provides the lowest cost however exchange 2007 will use the path of the least hops with lowest cost... which in this case is Site1 -> Site2 -> Site3. Additionally when messages are relayed from Site1 -> Site2 -> Site3, messages will not hit Site2 hub transport server, it will just use the subnet information in sites and services to send it in that direction. This is because if Site2 hub transport had to receive every email that comes through, it would use extra processing.
What if Site2 was responsible for spam filtering and you wanted email going from Site1 -> Site2 -> Site3 to actually pass through Site2's hub transport server?
This can be done by setting Site2 as a "Hub Site" by using the Set-ADSite command. This means that all messages flow along this journey must stop in site2 before being relayed on.
What if an exchange administrators wanted to to setup email replication different to active directory sites and services replication?
If you are not happy with the site link costs in AD, instead of updating sites and services you can use the powershell command Set-ADSiteLink to set new costs to that site link for exchange. This does not modify the value in sites and services. It only effects exchange. Whenever an exchange site link cost is specified, it will use this instead of the site link cost specified in AD Sites and Services. Very handy if you want mail to flow in a different direction to your AD replication.
We want to get messages flowing from Site1 -> Site2 -> Site3, and not Site1 -> SIte3. We do not want to modify active directory site links. What needs to be done?
Answer
To perform this we need to do 2 things:
- First make site2 a "hub site" by using the Set-ADSite cmdlet.
- Second use the Set-ADSiteLink on the site1-site3 sitelink and make it a value of 5 or higher.
Conclusion
Provided your Active Directory Sites and Services is setup correctly in regards to site links and costs to reflect your physical network infrastructure, this should give you all the knowledge you need when it comes to the Exchange 2007 site to ensure your messages flow throughout your organisation efficiently and effectively.
Exchange 2007 /exchange Not Redirecting
Exchange 2003 to 2007 migration. The new client access server role is put in place on a box with no other roles. A Exchange 2007 mailbox server exists on another server. Users who have an exchange 2007 mailbox on the 2007 mailbox server can login using https://mail.companydomain.com/owa. However when they use https://mail.companydomain.com/exchange they get the following error:
"You do not have permissions required to access this Web site. Please contact the Web site administrator."

However the username and password is right because if you go to https://mail.companydomain.com/owa it works fine.
https://mail.companydomain.com/exchange is meant to redirect them to https://mail.companydomain.com/owa automatically. To resolve this we installed 3 IIS components on the backend exchange 2007 mailbox server:
- ISAPI Extensions
- Basic Authentication
- Windows Authentication

After this /exchange redirected to /owa again as it should for 2007 mailbox users.
Out of Office Not Working - Exchange 2007
A company had Exchange 2007 SP1 installed in their environment. When users went to access out of office via Outlook they received the following message:
Your Out of Office settings cannot be displayed, because the server is currently unavailable. Try again later.
 Users were not getting this message via Outlook Web Access. They were able to change their Out of Office settings via OWA however the settings were not "sticking". Although it said it was enabled in OWA, it was not actually working! Users that currently had it set were not able to disable it...
This problem resides on the client access server role - a problem with the availability service.
In this instance we fixed this issue by installing Exchange 2007 SP2. To do this:
• Install the Exchange 2007 SP2 Schema Extensions (Requires Enterprise Admin and Schema Admin permissions)
• Install SP2 on the Client Access Server
• Install SP2 on the Hub Transport Server
• Install SP2 on both mailbox servers
• Install SP2 on unified messaging server
• Install SP2 on edge transport server
This issue is caused by a problem in the package. This problem only occurs when the package that contains the .NET Framework 3.5 with SP1 and the .NET Framework 2.0 with SP2 is installed on an Exchange Client Access server. This problem only occurs if you are running Exchange 2007 SP1. If you do not want to upgrade your Exchange Organisation to SP2 you can get around it by using a hotfix.
Your Out of Office settings cannot be displayed, because the server is currently unavailable. Try again later.

This problem resides on the client access server role - a problem with the availability service.
In this instance we fixed this issue by installing Exchange 2007 SP2. To do this:
• Install the Exchange 2007 SP2 Schema Extensions (Requires Enterprise Admin and Schema Admin permissions)
• Install SP2 on the Client Access Server
• Install SP2 on the Hub Transport Server
• Install SP2 on both mailbox servers
• Install SP2 on unified messaging server
• Install SP2 on edge transport server
This issue is caused by a problem in the package. This problem only occurs when the package that contains the .NET Framework 3.5 with SP1 and the .NET Framework 2.0 with SP2 is installed on an Exchange Client Access server. This problem only occurs if you are running Exchange 2007 SP1. If you do not want to upgrade your Exchange Organisation to SP2 you can get around it by using a hotfix.
Insite into Free/Busy Exchange 2003/2007
In this blog post we will be going through how free/busy works in detail in Outlook 2003/Exchange 2003 and Outlook 2007/Exchange 2007, then how they interact together.
Exchange 2003
As most of us know Free/Busy information is stored in a system public folder called SCHEDULE+FREE BUSY which is replicated to all exchange servers setup as a public folder replica server. SCHEDULE+FREE BUSY contains subfolders for each exchange administrative group.
Question. What places the Free/Busy information into the SCHEDULE+FREE BUSY system public folder?
This is actually done by the outlook client - not exchange at all. Outlook publishes the free/busy data for a user once every 15 minutes and again when Outlook is being shut down. Every message includes the entire free/busy information for the corresponding user that ranges from the current month to two months in the future.
Calendar information is stored in the user’s mailbox; only free/busy information is stored in the public folders.

Question. What about Outlook Web Access and Windows Mobile Devices?
Outlook Web Access and Outlook Mobile Access do not publish any free/busy data directly. Instead they rely on a free/busy publishing agent that is called MSExchangeFBPublish with runs as a part of the System Attendant Service. Its two functions are:
- Publishing free/busy data
- Deleting duplicate free/busy messages
 Exchange 2007
In Exchange 2007 the availability service on the client access server has taken over the role of public folders. Outlook clients find out which is their local client access server using autodiscover. Now there is a section within each users mailbox that contains the free busy information that all users can access by default to check a users availability status as shown in the below screenshot:

Users do not have permission to the other users mailbox directly for free/busy, they need to access this data through the availability service which is of course a IIS web application. By default you need to be authenticated to use the availability service meaning only users with domain credentials can access this data.
When a user updates his calendar, it also updates the availability data section under the users mailbox stored inside the edb file which the availability service just fetches.
I want to also point out here that the availability service also runs the calendar assistant which does things like automatically accept meeting requests in a tentative state, while waiting for your reply, hence writing data to your calendar under your mailbox on your behalf. You can change this behaviour however in outlook calendar options:

One more thing I’d like to point out about the availability service - it only talks to the mailbox servers using MAPI. If it needs to talk to a mailbox server in another site, it will relay the request via HTTP/HTTPS to the client access server in that site, then to the mailbox server via MAPI. Remember if you are going to put exchange in a remote site you always need client access, hub transport and mailbox role at least.
 How does the legacy Free/Busy system work with the new one?
The availability service has the ability to recieve free/busy information from both public/folders and user mailboxes to provide free/busy information to outlook 2007 clients. The availability service does not update data in public folders or user mailboxes, it only recieves!
Question. What updates the information in the public folders for legacy outlook 2003 clients?
If you remember when you install exchange 2007 it asks you "do you have legacy outlook clients in your environment?". Something along those lines... if you click yes it creates a public folder system database that your mailbox databases reference. If this exists and you create an appointment on an outlook 2007 client, outlook 2007 will update both the public folders free/busy along with its own mailbox database. Yes, it updates both! If the public folders system free/busy does not exist it will just update its own mailbox.
Exchange 2003
As most of us know Free/Busy information is stored in a system public folder called SCHEDULE+FREE BUSY which is replicated to all exchange servers setup as a public folder replica server. SCHEDULE+FREE BUSY contains subfolders for each exchange administrative group.
Question. What places the Free/Busy information into the SCHEDULE+FREE BUSY system public folder?
This is actually done by the outlook client - not exchange at all. Outlook publishes the free/busy data for a user once every 15 minutes and again when Outlook is being shut down. Every message includes the entire free/busy information for the corresponding user that ranges from the current month to two months in the future.
Calendar information is stored in the user’s mailbox; only free/busy information is stored in the public folders.

Question. What about Outlook Web Access and Windows Mobile Devices?
Outlook Web Access and Outlook Mobile Access do not publish any free/busy data directly. Instead they rely on a free/busy publishing agent that is called MSExchangeFBPublish with runs as a part of the System Attendant Service. Its two functions are:
- Publishing free/busy data
- Deleting duplicate free/busy messages

In Exchange 2007 the availability service on the client access server has taken over the role of public folders. Outlook clients find out which is their local client access server using autodiscover. Now there is a section within each users mailbox that contains the free busy information that all users can access by default to check a users availability status as shown in the below screenshot:

Users do not have permission to the other users mailbox directly for free/busy, they need to access this data through the availability service which is of course a IIS web application. By default you need to be authenticated to use the availability service meaning only users with domain credentials can access this data.
When a user updates his calendar, it also updates the availability data section under the users mailbox stored inside the edb file which the availability service just fetches.
I want to also point out here that the availability service also runs the calendar assistant which does things like automatically accept meeting requests in a tentative state, while waiting for your reply, hence writing data to your calendar under your mailbox on your behalf. You can change this behaviour however in outlook calendar options:

One more thing I’d like to point out about the availability service - it only talks to the mailbox servers using MAPI. If it needs to talk to a mailbox server in another site, it will relay the request via HTTP/HTTPS to the client access server in that site, then to the mailbox server via MAPI. Remember if you are going to put exchange in a remote site you always need client access, hub transport and mailbox role at least.

The availability service has the ability to recieve free/busy information from both public/folders and user mailboxes to provide free/busy information to outlook 2007 clients. The availability service does not update data in public folders or user mailboxes, it only recieves!
Question. What updates the information in the public folders for legacy outlook 2003 clients?
If you remember when you install exchange 2007 it asks you "do you have legacy outlook clients in your environment?". Something along those lines... if you click yes it creates a public folder system database that your mailbox databases reference. If this exists and you create an appointment on an outlook 2007 client, outlook 2007 will update both the public folders free/busy along with its own mailbox database. Yes, it updates both! If the public folders system free/busy does not exist it will just update its own mailbox.
Exchange 2007 SP2
Microsoft has finally released Exchange 2007 SP2. This requires another schema update to install - so make sure your account is member of the schema admins group and take a system state backup of your schema master before proceeding.
The Microsoft Exchange Team has already documented the core new features and changes of Exchange 2007 SP2 here. However I'm just going to repeat a few of the core features from there site:
• Enhanced Auditing - New Exchange auditing events and audit log repository enable Exchange administrators to more easily audit the activities occurring on their Exchange servers. It allows the right balance of granularity, performance, and easy access to audited events via a dedicated audit log repository. This simplifies the auditing process and makes review of audited events easier by segregating audited events in a dedicated location.
• Exchange Volume Snapshot Backup Functionality - A new backup plug-in has been added to the product that will enable customers to create Exchange backups when a backup is invoked through the Windows Server 2008 Backup tool. Exchange Server 2007 didn't have this capability on Windows Server 2008 and additional solutions were required to perform this task.
• Dynamic Active Directory Schema Update and Validation - The dynamic AD schema update and validation feature allows for future schema updates to be dynamic deployed as well as proactively preventing conflicts whenever a new property is added to the AD schema. Once this capability is deployed it will enable easier management of future schema updates and will prevent support issues when adding properties that don't exist in the AD schema.
• Public Folder Quota Management - SP2 enables a consistent way to manage quotas by improving the current PowerShell cmdlets to perform quota management tasks.
• Centralized Organizational Settings - SP2 introduces new PowerShell option that enable centralized management of many of the Exchange organization settings.
• Named Properties cmdlets - SP2 enables Exchange administrators to monitor their named property usage per database.
• New User Interface for Managing Diagnostic Logging- SP2 enables Exchange administrators to easily configure and manage diagnostic logging from within the Exchange Management Console.
I have implemented and have found no bugs to this point. The new powershells cmdlets are fantastic.
Why does it take so long for my calendar to update?
If you’re running outlook 2003, or have your mailbox on a exchange 2003 mailbox server this is why. With Exchange 2003 and Outlook 2003 there were big delays in free-busy information getting updated:
- By default, Outlook only updated free and busy information every 45 minutes. Furthermore, because of bandwidth and scalability issues, you could not decrease this interval.
- There were latencies that resulted from public folder replication - 15 minutes by default.
- In cross-forest scenarios, there were delays when you used the Microsoft Exchange Inter-Organization Replication tool to replicate free and busy information across forests.
If you move all your users accross to an Exchange 2007/2010 mailbox server, the availability service is used instead of public folders. With the availability service there is a very small delay (60 seconds) for information to be retrieved from outlook clients. This also requires Outlook 2007/2010 to ensure that you use the availability service instead of public folders.
Enable Logging to Trouble Shoot Availability Service in Outlook 2007
If your having trouble with the availability service, you are able to enable some diagnostic logging in Outlook 2007 to help you trouble shoot it. This logging applies to other stuff as well, but you will see all errors regarding free/busy!
1. In outlook go to Tools->Options->Other->Advanced Options and check enable logging
2. Click ok and get out of the dialogs.
3. Now, try getting free/busy.
4. Open %temp% folder.
5. Look in the olkdisc.log and olkas\
1. In outlook go to Tools->Options->Other->Advanced Options and check enable logging
2. Click ok and get out of the dialogs.
3. Now, try getting free/busy.
4. Open %temp% folder.
5. Look in the olkdisc.log and olkas\
Exchange 2003 SMTP Connectors in Exchange 2007
In this post I will give some inside into Exchange 2003 SMTP Connectors in Exchange 2007. Exchange 2007 treats a SMTP connector as a send connector - however exchange 2007 cannot modify a SMTP Connector.
In this environment we have a single hub transport server and a single exchange 2003 server acting as a relay. Our exchange 2003 SMTP connector is called "Ausmail01" as shown exchange 2003 system manager. Remember SMTP connectors are located under:
Administrative Grups --> Administrative Group Name --> Routing Groups --> Routing Group Name --> Connectors. Remember to see routing groups you need to ensure you have display routing groups enabled on the exchange organisation level.

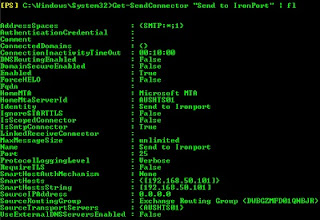
Here you can see the SMTP connector appears in Exchange 2007 as well. We also have a Send connector called "Send to Ironport" which is unique to exchange 2007.

Although the the exchange 2003 SMTP connectors appear in exchange 2007, exchange 2007 cannot be used to modify them. Saying that some attributes can be changed using Exchange 2007 such as Maximum message size limit - but to stop yourself hitting walls its best to use System Manager when dealing with these legacy SMTP connectors. Also if you try and use power shell to work with these legacy SMTP connectors you will recieve errors too. Here I showed you what I got when I tried to change the logging level on the Ausmail01 SMTP Connector.

One thing that I think Microsoft can improve is the fact there is no attribute on these connectors stating if they are a legecy SMTP connector or not. Lets look at the attributes in Powershell - you will see that they are exactly the same. An attribute defining if its legacy with a true or false would make it much more easy.
Ausmail01 SMTP Connector:
 Send to Ironport Send Connector:
To determine how your mail is flowing out of your exchange organisation, look at the servers that are associated with the SMTP or Send Connector stored in the SourceTransportServers attribute. { } means its a multivalue attribute. Remember you do not need a send connector to relay mail around your exchange organisation, only when mail is needing to leave the organisation. Exchange 2007 uses hub transport servers to relay mail around between other hub transport servers. Exchange 2003 uses routing group connectors. When you have them mixed you will have 2 routing group connectors for bidirectional flow linking the exchange 2007 routing group to the exchange 2003 routing group or routing group(s) for that matter.
When doing a migration from exchange 2003 to 2007 you will notice that you have a connector already, the exchange 2003 SMTP connector (if one exists - remember exchange 2003 you do not need SMTP connectors). This means all your mail from exchange 2007 will go accross the routing group connector and out through exchange 2003. If you add a Send Connector for one or more hub transport servers, the mail will no longer need to go accross the routing group connector and out through exchange 2003, as the hub transport server will be able to take care of mail leaving the exchange organisation itself.
In this environment we have a single hub transport server and a single exchange 2003 server acting as a relay. Our exchange 2003 SMTP connector is called "Ausmail01" as shown exchange 2003 system manager. Remember SMTP connectors are located under:
Administrative Grups --> Administrative Group Name --> Routing Groups --> Routing Group Name --> Connectors. Remember to see routing groups you need to ensure you have display routing groups enabled on the exchange organisation level.

Here you can see the SMTP connector appears in Exchange 2007 as well. We also have a Send connector called "Send to Ironport" which is unique to exchange 2007.

Although the the exchange 2003 SMTP connectors appear in exchange 2007, exchange 2007 cannot be used to modify them. Saying that some attributes can be changed using Exchange 2007 such as Maximum message size limit - but to stop yourself hitting walls its best to use System Manager when dealing with these legacy SMTP connectors. Also if you try and use power shell to work with these legacy SMTP connectors you will recieve errors too. Here I showed you what I got when I tried to change the logging level on the Ausmail01 SMTP Connector.
One thing that I think Microsoft can improve is the fact there is no attribute on these connectors stating if they are a legecy SMTP connector or not. Lets look at the attributes in Powershell - you will see that they are exactly the same. An attribute defining if its legacy with a true or false would make it much more easy.
Ausmail01 SMTP Connector:


To determine how your mail is flowing out of your exchange organisation, look at the servers that are associated with the SMTP or Send Connector stored in the SourceTransportServers attribute. { } means its a multivalue attribute. Remember you do not need a send connector to relay mail around your exchange organisation, only when mail is needing to leave the organisation. Exchange 2007 uses hub transport servers to relay mail around between other hub transport servers. Exchange 2003 uses routing group connectors. When you have them mixed you will have 2 routing group connectors for bidirectional flow linking the exchange 2007 routing group to the exchange 2003 routing group or routing group(s) for that matter.
When doing a migration from exchange 2003 to 2007 you will notice that you have a connector already, the exchange 2003 SMTP connector (if one exists - remember exchange 2003 you do not need SMTP connectors). This means all your mail from exchange 2007 will go accross the routing group connector and out through exchange 2003. If you add a Send Connector for one or more hub transport servers, the mail will no longer need to go accross the routing group connector and out through exchange 2003, as the hub transport server will be able to take care of mail leaving the exchange organisation itself.
Exchange 2007 Retry Messages in Queue
In exchange 2007 you can view all messages in your queue by using the Get-Messages cmdlet. To view all message queues use Get-Queue. Exchange creates a seperate queue for each outbound domain. To retry particular messages to a particular domain you can use the Retry-Queue command.
To retry an individual message use Resume-Message. To resend all messages use:
Get-Message Resume-Message
To retry an individual message use Resume-Message. To resend all messages use:
Get-Message Resume-Message
Calendars Exchange 2003 vs Exchange 2007 in Outlook
In this post I will be showing you the difference between Exchange 2003 and Exchange 2007 public folders. Both screenshots below are using Outlook 2007.
Below is an Exchange 2003 mailbox:

Below is an Exchange 2007 mailbox:

In exchange 2003 by default everyone has full details to view your calendar. In exchange 2007 by default everyone only has permissions to view your free-busy information only. If you move a mailbox from exchange 2003 to exchange 2007, it will change from full details to free/busy. People that could view your entire calendar will now only be able to view your free/busy status!
Please take note of this before migrating mailboxes!
Additionally one more thing, if a user complains free/busy is broken, make sure the user they are trying to view has not disabled their freebusy status. Also take note for exchange 2003 users, free/busy takes 15 minutes to update itself where exchange 2007 uses the availability service via IIS so it is very quick!
Exchange 2007 Isinteg Error
Had a really weird error, when I ran Isinteg -s AUSEXCH02 -fix -test alltests against my mailbox server and selected my offline public folder database I got the following error:
Isinteg: the request to cancel verification process failed.
Isinteg: the request to stop verification process failed.
The verification has probably been interrupted.
Please review the log file for more information.

I got past this by running:
Isinteg -s servername -fix -test rowcounts
Then I ran:
Isinteg -s servername -fix -test alltests
Autodiscover Issue: 401 Unauthorized
Autodiscover was not working at a client, we were just getting a 401 Unauthorised error. I know for a fact authenticated users had NTFS read permissions of the autodiscover virtual directory so it was a weird issue. Here are the symptoms we were recieving:


When we log into the exchange server and go to the autodiscover website in internet explorer using localhost it works:
 When you go to the proper address set by Set-ClientAccessServer -Identity CLIENTACCESSSERVER -AutoDiscoverServiceInternalUri domain.local you get the following error the same as powershell:

This is caused by the loopback check being enabled. To disable loopback perform the following action on the client access servers:
1.Click Start, click Run, type regedit, and then click OK.
2.In Registry Editor, locate and then click the following registry key:
HKEY_LOCAL_MACHINE\SYSTEM\CurrentControlSet\Control\Lsa
3.Right-click Lsa, point to New, and then click DWORD Value.
4.Type DisableLoopbackCheck, and then press ENTER.
5.Right-click DisableLoopbackCheck, and then click Modify.
6.In the Value data box, type 1, and then click OK.
7.Quit Registry Editor, and then restart your computer.
Now when you test autodiscover settings everything will work:


When we log into the exchange server and go to the autodiscover website in internet explorer using localhost it works:


This is caused by the loopback check being enabled. To disable loopback perform the following action on the client access servers:
1.Click Start, click Run, type regedit, and then click OK.
2.In Registry Editor, locate and then click the following registry key:
HKEY_LOCAL_MACHINE\SYSTEM\CurrentControlSet\Control\Lsa
3.Right-click Lsa, point to New, and then click DWORD Value.
4.Type DisableLoopbackCheck, and then press ENTER.
5.Right-click DisableLoopbackCheck, and then click Modify.
6.In the Value data box, type 1, and then click OK.
7.Quit Registry Editor, and then restart your computer.
Now when you test autodiscover settings everything will work:

Outlook Anywhere keeps prompting for Password
I came across this case where outlook kept prompting for login every time a user tried to login to outlook via outlook anywhere. They would enter their credentials, and then it would just reprompt them for login.
It turned out to be the certificate... Outlook anywhere does not allow for Subject Alternate Names on certificates like OWA (Outlook Web Access), and OMA (Outlook Mobile Access) do. This company had the same dns name space internally as what they use externally, and registered their certificate to be that of the host name of their old exchange server!!! (yuck). In result I just ignored it and used a subject alternate name that of webmail which they also registered for all services. Bottom line - Outlook Anywhere will not use subject alternative names, only the correct issued to: name of the certificate. I did not find this documented anywhere!


Here is where this is located by default in outlook:

Exchange Autodiscover sets this to msstd: which is in this case webmail.domain... however in our case its toph-exchange.domain...
To get autodiscover to distribute this new one enter in:
Set-OutlookProvider EXPR -Server exch01 -CertPrincipalName "msstd:toph-exchange.restofdomain..."
You only need to set this on the EXPR outlook provider as this is the provider that deals with outlook anywhere.
Please note this is only one fix for when outlook continuously prompts for authentication - there are many causes for this symptom but I documented this one as I have never seen this before nor seen any documentation around this on the internet.
Deleted User Account or Mailbox not appearing in Disconnected Mailboxes
You deleted a user account/mailbox, you panic!
Before you go to your backups... lets just check that we have mailbox retentions enabled.
Server Configuration --> Mailbox --> Right click mailbox database (not storage group) hit properties --> Retention is under Deleted Settings on the Limits Tab.
User When a mailbox user/mailbox is deleted, it does not get removed from the exchange server until the retention has expired. However it does not get marked as a disconnected mailbox until the mailbox cleanup agent runs. The mailbox cleanup agent runs nightly by default as scheduled.
Note: Disconnected mailboxes are mailboxes marked as deleted pending their awaited retention period to expire before being permanently removed.
Scenario: You accidently delete a user account with a mailbox attached. Well if you have two DC's, great, reboot the one into directory services restore mode, restore sysstate then fireup your ntdsutil to mark the deleted user account as authorative. Back in business. But what if you only have one DC?
An alternative method is to create a new user account for that user, put him in the appropriate groups, then link his deleted mailbox to that account. You fire up your exchange management console/shell look in the disconnected users area, but hey, its not in the disconnected mailboxes area. Bet your panicing now. The reason its not in the disconnected mailboxes area is because exchange only realises a mailbox has been disconnected/deleted once the cleanup agent runs, scheduled nightly by default. Yes you can kick it off manually in management shell. Fire up your exchange management shell. The command you want is:
Clean-MailboxDatabase "Mailbox Database"
You have 30 mailbox databases, how do you know which mailbox database the mailbox was in? Who cares if you dont know, just run it on all by piping the Get-MailboxDatabase command.
Get-MailboxDatabase Clean-MailboxDatabase
Your new user account is back up online, however ppl's emails are bouncing saying recipient object cannot be found. Yes this is a pain in the ass. This is because the GUID id of the new mailbox does not match that of the NK2 file on the client workstations. The outlook.NK2 holds all the autocomplete contacts for outlook. The NK2 populates itself from the offline address book on a clients workstation. For affected users, you need to update the offline address book as it updates every 24 hours by default, then delete the NK2 file. Google for more info.
How to configure an IP Address Blocklist in Exchange 2007
To block certain domain's or IP Addresses from sending email into your organisation, use powershell and execute the following:
Set-IPBlockListConfig -Enabled:$True
Add-IPBlockListEntry -IPAddress 123.456.0.1
Add-IPBlockListEntry -IPRange 123.456.1.1-123.456.0.255
To remove IP Addresses from being blocked execute the following in powershell:
Remove-IPBlockListEntry
Set-IPBlockListConfig -Enabled:$True
Add-IPBlockListEntry -IPAddress 123.456.0.1
Add-IPBlockListEntry -IPRange 123.456.1.1-123.456.0.255
To remove IP Addresses from being blocked execute the following in powershell:
Remove-IPBlockListEntry
Mail flow stops with 430 4.2.0 STOREDRV; mailbox logon failure
This is one of the most annoying error that you may probably face with your HT servers and they stop sending emails to MBX servers. There are multiple things that you need to go through to fix this problem. This post is just provide some common troubleshooting steps that can be performed if you face this problem. I faced this one toady in one of my customer’s Exchange 2007 SP2 environment.
This error is most likely generated by permissions issue in active directory. The best bet to find out these problems is using ExBPA. In this particular case the permissions were messed up at the server object level in active directory. Inherited permissions from parent objects got removed due to some reasons.
Here are few things that you should try in this case:
- First off, make sure your active directory replication is not experiencing any problems.
- All domain controllers, global catalogs have the correct time and synchronized with your designated NTP server.
- You can use net time /set \\ntpservername if you find any issue discrepancies in the time.
Make sure your HT and MBX server’s records are correctly registered in DNS and name resolution works perfectly fine. In some cases, you might want to add PTR records for all of your MBX, DS and HT Servers
Make sure your Default Domain Controller Policy had Exchange Server group added in Manage auditing and security log located at
Computer Configuration\Windows Settings\Security Settings\Local Policies\User Rights Assignment of your default domain controller policies.
One more things in basic troubleshooting is to check the logon account used for Microsoft Exchange Mail Submission service on mailbox server. It should be set to Local System and Transport Service on Hub transport server should be set to run as Network Service


Once you have made sure all these things are in place the permissions are something that we need to concentrate on.
- Use EXBPA to ensure that none of the Exchange Server objects have permissions inheritance blocked on them. If you have you should see something similar to below:

- If you really see something like above then the inheritance of permissions to these objects must be allowed. To do this follow below steps:
- Open ADSIEDIT.MSC and browse to the location CN=<Exchange Server Name>,CN=Servers,CN=Exchange Administrative Group (FYDIBOHF23SPDLT),CN=Administrative Groups,CN=Exchange Geek Inc,CN=Microsoft Exchange,CN=Services,CN=Configuration,DC=Domain,DC=local
- Right click on the server object that was found not inheriting permissions from parent, Select properties, select Security Tab, Click Advanced button and check the check box “

- We are not done yet. There are few more permissions we should check even after allowing inheritance on this object. Follow the previous step to get to security tab of the properties window of Exchange Server object

- As you see in above screenshot below permissions should be assigned to the Exchange Server security group:
- Store Constrained Delegation – Allow
- Store read and write access – Allow
- Store read only access – Allow
- Store transport access – Allow
These permissions should be checked on all HT servers and MBX servers using ADSIEDIT and they must be as shown above.
Force the replication across the site and make sure that all permissions are replicated to all the global catalogs in that site at least.
Hope that helps!
How to Restore Active Directory Account and Mailbox using Exchange Database
In this article, I have explained the various steps involved in re-producing the subject issue.
Before you begin to perform the following procedures, the account must be delegated the following:
• Exchange Organization Administrator Role
Though this article was already present in TechNet site, I have tried to make it easier to understand with some screenshots.
Now in the previous versions of exchange it was quite easy to restore the backup to recovery server (EXCHANGE 2000) or by creating RSG (EXCHANGE SERVER 2003). In Exchange server 2007 the process is different. I am going to show you how this can be accomplished by using Exchange Management Shell.
For testing purpose I had created few accounts. And will be deleting those accounts after taking backup.

Now an administrator has three options in Exchange Server 2007 for deleting an AD account.
Either we can use EMC, EMS or Active Directory Users & Computers.
Below is an example using EMS? Here we are deleting RAM.
Either we can use EMC, EMS or Active Directory Users & Computers.
Below is an example using EMS? Here we are deleting RAM.

Below is an example using EMC? Here we are deleting SAM account; however the mailbox will show in the disconnected mailbox. The user will lose all AD related permission.


Be careful while selecting the Remove option.


Below is an example using ADUC? Here we are deleting TAM. The mailbox will show in the Disconnected Mailbox.


Now since I have a backup I can either restore data directly to the production, doing so will lead to downtime & there will be an inconsistencies for end users (Not recommended).
The best option is to create Recovery Storage Group.
In this example I had already created RSG.
The best option is to create Recovery Storage Group.
In this example I had already created RSG.
Since Exchange Server 2007 has the capability of mounting database on any server within the same ORG.
In this example I had created RSG & moved the database to a newly created Mailbox Store. New Database was created since we don’t have an option of getting Mailbox Statistics using Exchange Management Shell for RSG. Once the database is restored to RSG check the database health and then copy it to the Production Store (Temporary).
Make sure you rename the database file.
For example in our case the database file name was Mailbox Database.edb. I had renamed it to Mailbox Databases.edb.
Make sure you rename the database file.
For example in our case the database file name was Mailbox Database.edb. I had renamed it to Mailbox Databases.edb.

I will be sending the CreateLdifFromDisconnectedMailboxes.ps1. Remember you have to paste this .ps1 file in the below location.
C:\Program Files\Microsoft\Exchange Server\Scripts
C:\Program Files\Microsoft\Exchange Server\Scripts
Run the below command to create .ldf file.
Here I had created an OU named “DisasterRecovery”. Customer might have OU’s so simply provide the DN of the OU and the command will export all disconnected mailboxes and associated user account to file named as “ldifout.ldf”.
Note: – The user accounts are still not created.
Here I had created an OU named “DisasterRecovery”. Customer might have OU’s so simply provide the DN of the OU and the command will export all disconnected mailboxes and associated user account to file named as “ldifout.ldf”.
Note: – The user accounts are still not created.


In the above notepad I had removed all other accounts and I just kept only those accounts for which we are working. (RAM, SAM & TAM).


In the above command it says only 3 entries modified. This is because I had modified the .ldf file. Once the above command completes successfully you can see the account and mailbox created.


Since we had created this users and mailboxes using Exchange Management Shell. You have to restart IIS & MsExchangeIS service. Further you have to make sure UPN for these users is showing up in the Active Directory Users & Computers if not add them manually.

Now you can see SAM is able to login and able to see his old emails.
Exchange hub transport “Mail.que” file large in size
I had to deal with a “huge” mail.que file this morning and thought of letting you know how to handle similar issues. So, here is the scenario
- Came to know about this issue only when SCOM alerted for a low disc space
- On one of the hub transport servers, the mail.que file reached to 148GB (unbelievable)
A little about the mail.que file:
The mail.que file temporarily stores all emails before it is delivered to the target. It is an ESE database which means it is similar in architecture like an Exchange mailbox database, the edb file.
As per a TechNet article
A queue is a temporary holding location for messages that are waiting to enter the next stage of processing. Each queue represents a logical set of messages that a transport server processes in a specific order. Queues exist only on servers that have the Hub Transport server role or Edge Transport server role installed.
Let’s take a look at the other files residing in this location:
Trn.chk – Checkpoint file like E0x.chk in exchange
Trn.log – The transaction log file which is getting committed now. Similar to E00.log in exchange
Trntmp.log – The next transaction log file which is created in advance.
Trnnnn.log – Next transaction log file created when Trn.log reaches its maximum size.
Trnres00001.jrs – First reserve log file. Only used when the hard disk drive that contains the transaction log runs out of space to stop the queue database cleanly
Trnres00002.jrs – Second Reserve log file.
Temp.edb – Temp database used to verify database schema on start-up.
Back to the issue:
You need to know 2 important terms before we proceed since this issue could have caused due to a combination of both:
- PipelineTracingEnabled: This is used for troubleshooting purposes and is not enabled by default.
- MaxDumpsterSizePerStorageGroup: This is for Exchange 2007. The maximum size of the transport dumpster queue per storage group. This is a universal setting for all storage groups; you can’t set variable sizes for each storage group. The recommended size is 1.5 times the maximum message size that can be sent. For example, if the maximum size for messages is 10 megabytes (MB), you should configure the MaxDumpsterSizePerStorageGroup parameter with a value of 15 MB. Read more here
You can use the cmdlet: Get-TransportServer | fl to get these details.
In my case, tracing was enabled and the dumpster was specified to be 50GB.
Enough talking and lets delete it now
This is the suggested way to get rid of the old mail.que file and get a new one without any downtime. I proceed under the assumption that you have multiple hub transport servers to process emails so, no emails will be processed at the time of this change. This
should take about less than a minute. I will call the Hub transport server HUB01. Remember that steps 6-8 are very important and will ensure none loses emails
should take about less than a minute. I will call the Hub transport server HUB01. Remember that steps 6-8 are very important and will ensure none loses emails
- Login to HUB01
- Take a look at the size of the mail.que file

- Open exchange management shell and run “Get-TransportServer ” HUB01″ |fl
- Here, look for PipelineTracingEnabled. This should be set to False. If not, run
Set-TransportServer HUB01 -PipelineTracingEnabled $False
- Now run “Get-TransportConfig” and ensure that
MaxDumpsterSizePerStorageGroup is in MB’s and not GB’s
MaxDumpsterTime : 7.00:00:00
If not, run
Set-TransportConfig -MaxDumpsterSizePerStorageGroup <size> -MaxDumpsterTime <timespan>
- Now run “Get-Queue” and take a look at the count of messages in HUB01
- Goto services.msc and Pause the Microsoft Exchange Transport service
- Again, run “Get-Queue” and ensure all pending messages are “zeroed” out
- Once messages pending becomes zero, stop the Transport service
- Move the mail.que file and all others to a new folder in the same location
- Start the Transport service
- Take a look at the queue again
- You should see that messages would have started getting delivered
- Now you can backup or safely delete the old mail.que file
A problem occurred while trying to use your mailbox. Please contact technical support for your organization.
After migrating a user to Exchange 2007, Outlook Web Access or OWA stops working with the error shown.
“A problem occurred while trying to use your mailbox. Please contact technical support for your organization.”
Additionally, you get the following message:
Request
Url: https://<user’s<user’s owa link>:443/owa/lang.owa
User host address: <user’s ip address>
Url: https://<user’s<user’s owa link>:443/owa/lang.owa
User host address: <user’s ip address>
Exception
Exception type: Microsoft.Exchange.Data.Storage.StoragePermanentException
Exception message: There was a problem accessing Active Directory.
Call stack
Microsoft.Exchange.Data.Storage.ExchangePrincipal.Save()
Microsoft.Exchange.Clients.Owa.Core.RequestDispatcher.DispatchLanguagePostLocally(OwaContext owaContext, OwaIdentity logonIdentity, CultureInfo culture, String timeZoneKeyName, Boolean isOptimized)
Microsoft.Exchange.Clients.Owa.Core.RequestDispatcher.DispatchLanguagePostRequest(OwaContext owaContext)
Microsoft.Exchange.Clients.Owa.Core.RequestDispatcher.PrepareRequestWithoutSession(OwaContext owaContext, UserContextCookie userContextCookie)
Microsoft.Exchange.Clients.Owa.Core.RequestDispatcher.InternalDispatchRequest(OwaContext owaContext)
Microsoft.Exchange.Clients.Owa.Core.RequestDispatcher.DispatchRequest(OwaContext owaContext)
System.Web.HttpApplication.SyncEventExecutionStep.System.Web.HttpApplication.IExecutionStep.Execute()
System.Web.HttpApplication.ExecuteStep(IExecutionStep step, Boolean& completedSynchronously)
Inner Exception
Exception type:
Microsoft.Exchange.Data.Directory.InvalidADObjectOperationException
Exception message: Property Languages cannot be set on this object because it requires the object to have version 0.1 (8.0.535.0) or later. Current version of the object is 0.0 (6.5.6500.0).
Call stack
Microsoft.Exchange.Data.Directory.PropertyBag.set_Item(PropertyDefinition key, Object value)
Microsoft.Exchange.Data.Directory.ADObject.set_Item(PropertyDefinition propertyDefinition, Object value)
Microsoft.Exchange.Data.Directory.ADObject.StampCachedCaculatedProperties(Boolean retireCachedValue)
Microsoft.Exchange.Data.Directory.ADObject.ValidateWrite(List`1 errors)
Microsoft.Exchange.Data.Directory.Recipient.ADRecipient.ValidateWrite(List`1 errors)
Microsoft.Exchange.Data.Directory.Recipient.ADUser.ValidateWrite(List`1 errors)
Microsoft.Exchange.Data.Directory.ADSession.Save(ADObject instanceToSave, IEnumerable`1 properties)
Microsoft.Exchange.Data.Storage.ExchangePrincipal.Save()
This behavior is caused by an attribute – msExchVersion being 0 for the affected user.
Check it using the cmdlet:
Get-Mailbox ratish | format-list ExchangeVersion If the output is 0.0,
Run this:
Set-Mailbox ratish –ApplyMandatoryProperties Transport Dumpster feature in Exchange 2007
Transport Dumpster feature was introduced on the Hub Transport role in Exchange 2007.
If you had installed a CCR, there is an instance where we need to specify a Transport Dumpster and Microsoft recommends to do so on the server which holds the Hub Transport role.
If you had installed a CCR, there is an instance where we need to specify a Transport Dumpster and Microsoft recommends to do so on the server which holds the Hub Transport role.
The Transport Dumpster maintains the queue of messages that were delivered to mailboxes which reside in a CCR. This helps for a lossy failover which protects data by giving option to have a clustered mailbox server (CMS) automatically come online on another node with a limited amount of data loss. Thus, in an event of a lossy failover, exchange automatically re-delivers the recent e-mail messages to user mailboxes on the failed over CCR using the transport dumpster where the e-mail messages were still stored.
The Transport Dumpster is configured by default. You can view the transport dumpster settings by running get-TransportConfig. There are two important setting when configuring the transport dumpster:
MaxDumpsterSizePerStorageGroup – The maximum size of the transport dumpster queue per storage group. This is a universal setting for all storage groups; you can’t set variable sizes for each storage group. The recommended size is 1.5 times the maximum message size that can be sent. For example, if the maximum size for messages is 10 megabytes (MB), you should configure the MaxDumpsterSizePerStorageGroup parameter with a value of 15 MB.
MaxDumpsterTime – The amount of time an email will remain in the transport dumpster queue. This is the time a message will be retained if it is not forced out for space reasons (MaxDumpsterSizePerStorageGroup). It is recommended that this be set to 7 days.
If either of the above is set to 0, the Transport Dumpster will be disabled.
The default setting for the Transport Dumpster are:
MaxDumpsterSizePerStorageGroup: 18 MB
MaxDumpsterTime: 7 days (7.00:00:00)
If either the size limit or time limit is hit, mail will be removed from the queue by order of first in, first out.
To remove a recovery storage group
- Remove the mailbox database from the RSG by running the following Exchange Management Shell command:
Remove-MailboxDatabase -identity <Server_Name>\<RSG_Name>\<Database_Name>
You will receive a warning that you must manually remove the database files that are located in the RSG.
|
- Remove the RSG by running the following Exchange Management Shell command:
Remove-Storagegroup -identity "<Server_Name>\<RSG_Name>"
Eseutil /R Recovery Mode
Recovery refers to the process of playing transaction log files into a database. There are two kinds of recovery:
- Hard recovery: A transaction log replay process that follows a database restoration from an online backup
- Soft recovery: A transaction log replay process that occurs after any of the following activities:
- a database is remounted after an unexpected stop
- transaction logs are replayed into an offline file copy backup of a database
- logs are replayed into a Volume Shadow Copy Service (VSS) backup set
For more information about syntax and about running Eseutil /R recovery mode, see How to Run Eseutil /R (Recovery).
Hard recovery occurs when transaction log files must be replayed into a restored online backup. In all other recovery scenarios, soft recovery occurs. You can use Exchange Server Database Utilities (Eseutil.exe) to perform a hard recovery by using by using the Restore mode (/C).
In the most common soft recovery scenario, an external event unexpectedly stops an Exchange database, but the database and log files remain intact and in place. When the database is mounted again, Exchange reads the checkpoint file and begins to replay the transaction log that is listed as the checkpoint log. If no checkpoint file exists, replay begins at the oldest log file available in the transaction log folder for the storage group.
Exchange writes completed transactions to the database files. These are transactions that are found in the log file and that have not already been written. Exchange then reverses any incomplete transactions. Exchange never begins writing a transaction into the database files until all the operations composing it are secured to the log files. You do not have to physically undo or stop a transaction in the database if all uncommitted transaction logs that exist when the unexpected stop occurs also exist when replay begins.
A fundamental assumption of the soft recovery process is that no database or log files have been moved, deleted, or destroyed either by the failure or by the administrator after the failure.
|
The following sections describe various recovery scenarios.
Transaction log files are not in the current folder
Generally, you should always run Eseutil /R from the folder that contains the transaction log files to be replayed. This is because the default soft recovery process looks in the transaction log files to find the path to the databases. If you run Eseutil /R from a folder in which no log files exist, a new transaction log file is generated, and this new log file will not contain the location of the databases. If you want to run a soft recovery from outside the transaction logs folder, add the following switch to the command:
/Lpath_to_logfiles
For example, add this switch:
Eseutil /R E00 /Ld:\exchsrvr\logfiles
Controlling the checkpoint file
When you manually run a soft recovery, you usually want to either delete or hide the checkpoint file. This is because, typically, you want to replay all available transaction logs instead of starting from the middle of an available sequence.
If you are running a soft recovery from a folder that contains a valid checkpoint file, and you do not want to have that file affect recovery, you must define a different path for a checkpoint file to be created during recovery. This might be required after you restore an offline backup to a storage group in which databases are running.
If you are running recovery from a different folder, and you want to use the checkpoint file to control recovery, you must point to the path for the checkpoint file.
If you want to control the use of the checkpoint file during a soft recovery, add the following switch to the recovery command:
/Spath_to_or_away_from_current_checkpoint
For example, add this switch:
Eseutil /R E00 /Sd:\
Recovering a storage group with a missing mailbox or public folder database
If a storage group is unexpectedly stopped, and one of the inconsistent mailbox or public folder databases is removed or unavailable, you cannot mount any of the databases in the storage group until you restore the missing database or until you run manual recovery by using the /I switch.
Before you run a recovery that ignores the missing mailbox or public folder database, you should make a backup copy of all transaction log files, including the current log file, (Enn.log). Enn.log is changed through the process of recovering the other databases. After this, it may not be useable for recovering the missing database if it is made available again.
|
Recovering a database out of place
Recovering a database that is out of place completely isolates the recovery process from the running storage group. Use this method when you want to recover an offline backup in a recovery storage group, and you intend to play any log files into the backup.
To prepare to do this procedure, you should move the database file and all transaction logs that you intend to play into a single temporary folder. From this folder, you can run the following command:
Eseutil /R Enn /I /D
For example, run this command:
Eseutil /R E00 /I /D
The /I switch may not be necessary, depending on whether there are clean shutdown records in the transaction logs for other databases that were attached to the logs. Using the switch in this circumstance is recommended so that you do not have to start recovery again if there is a hanging attachment somewhere in a log file.
If the /D switch does not exist, the database paths that are recorded in the transaction log files are used to locate the databases. If the /D switch is used without a path, the current directory is used as the path for the database files. If the /D switch is immediately followed (with no intervening space) by a file path, that path is used to locate the database files.
To avoid typing errors, we strongly recommend that you eliminate the need for using paths that have Eseutil switches whenever possible. To do this, run Eseutil from a folder in which all data files already exist.
After recovery finishes and the database files are in clean shutdown state, the files may be moved into the appropriate storage group and attached to the log files, thereby mounting the databases.
To make sure that a database mounts, you may have to click to select the This database can be overwritten by a restore check box on the database object properties in the Exchange Management Console.
|
Recovering a database that has missing log files
In Exchange Server 2007, a new feature named Lost Log Resilience (LLR) protects Exchange databases from losing the last few log files, and enables faster recovery. When an LLR-protected log file is missing or corrupted, typical database mounting or recovery by using Eseutil fails and does not provide the new /A recovery option. Event ID 523 is logged to the Event log and states the kind of failure that occurred. On a database on which an LLR-protected log file is missing or corrupted, you can run Eseutil recovery by using the /A option in recovery mode as follows:
ESEUTIL /R Enn /A
By default, in a non-clustered Exchange Server 2007 server, only the last file is protected by LLR. Therefore, this option can be used only when the last transaction log file is missing. For more information, see Lost Log Resilience and Transaction Log Activity in Exchange 2007.
You can see the command-line reference and syntax for Eseutil by typing eseutil /? at a command prompt. However, the /A option is not listed in the Exchange 2007 RTM version of the command-line reference.
|
When you recovered a database that had missing log files in previous versions of Exchange, you would have to either restore databases from backups or repair the existing database file by using Eseutil /P. With Exchange 2007, database recovery is enhanced so that you can recover a database that has log files missing in the LLR range by running the recovery command and using the /A option.
Exchange 2007 Message Tracking
In Exchange 2000 and Exchange 2003, message tracking is enabled on a per-server basis by bringing up the properties of an Exchange server within Exchange System Manager. On the General tab are options to enable message tracking and subject logging, as well as options to control the number of log files to retain and the location of these log files. A sample of this General tab is shown below in Figure 1.

Figure 1: Exchange 2003 Message Tracking
As you might imagine, Exchange 2007 still has message tracking but there are some differences as I will explain. First, one big difference to note is that it’s not possible to configure message tracking with the Exchange Management Console (EMC), the Exchange 2007 equivalent of Exchange 2000 and Exchange 2003’s Exchange System Manager. To configure message tracking, you need to use the Exchange Management Shell (EMS) and in part one of this two-part article I’ll show you how. Also, note that message tracking is configured on Exchange 2007 servers that are configured with the Mailbox, Hub Transport, or Edge Transport roles. In other words, you cannot configure message tracking on Client Access or Unified Messaging servers.
Default Settings
First, let’s look at the default settings that are relevant for Exchange 2007 message tracking. To examine the default settings, remember that you can only perform the cmdlets below on Mailbox, Hub Transport or Edge Transport servers. With this in mind, the following PowerShell cmdlet can be run to examine the objects on a Hub Transport or Edge Transport server, using the format-list or fl formatting cmdlet:
Get-TransportServer SERVERNAME | fl
The same process can be performed against a Mailbox server via the following cmdlet:
Get-MailboxServer SERVERNAME | fl
For the remainder of this article, I’m going to focus on running cmdlets against the Hub Transport server role. All you need to do is substitute TransportServer with MailboxServer if you wish to perform the cmdlets against Mailbox servers. Incidentally, if you’ve elected to have the Mailbox and Hub Transport server roles combined onto a single server, you can use either cmdlet.
The result of running the Get-TransportServer cmdlet will look something like that shown in Figure 2.

Figure 2: Get-TransportServer cmdlet Result
What does this tell us about message tracking? Absolutely nothing! You can see from Figure 2 that if you execute the Get-TransportServer cmdlet with the above options, quite a few objects are returned which can make identifying the specific message tracking objects quite difficult - you’ll have to scroll up through the window contents to find them. I happen to know that the objects we are interested in all contain the string messagetracking within them, so a better cmdlet to run is:
Get-MailboxServer SERVERNAME | fl *messagetracking*
The result of this cmdlet is shown below in Figure 3. In actual fact, you could just use a filter string of *tracking* for this to work successfully.

Figure 3: Filtered Get-TransportServer cmdlet Result
It’s clear from Figure 3 what the various message tracking options are on this server and what their values are. Let’s go through each object and examine the default settings and how to change them.
Enabling/Disabling Message Tracking
Set-TransportServer SERVERNAME –MessageTrackingLogEnabled $false
Note the use of the Set-TransportServer cmdlet rather than the Get-TransportServer cmdlet. Replace $false with $true to re-enable message tracking.
Log Location
Now that we know message tracking is enabled by default, where are the log files stored? Those of you familiar with Exchange 2000 and Exchange 2003 will remember that, by default, the message tracking logs are stored in the \Program Files\exchsrvr\{servername}.log folder as shown above in Figure 1. With Exchange 2007, the default folder is a little deeper than before: \Program Files\Microsoft\Exchange Server\TransportRoles\Logs\MessageTracking.
Should you wish to change the location of the message tracking log files, this can be achieved by running the following cmdlet:
Set-TransportServer SERVERNAME –MessageTrackingLogPath LOGPATH
For example, if you wished to change the tracking log file directory to D:\Tracking Logs on server E2K7, you’d use the following cmdlet:
Set-TransportServer E2K7 –MessageTrackingLogPath “D:\Tracking Logs”
One useful thing that I found is that if the proposed tracking log file directory does not exist prior to running the cmdlet, it will be created for you when you run the cmdlet.
There are several additional things that are worth noting about changing the message tracking directory:
- After changing the location of the log files, existing logs will remain in their previous location; new logs will be created in the new location.
- The new location cannot be a UNC path as it must be local to the Exchange 2007 server.
Although there are situations where permissions can be set automatically, I still think it prudent to ensure that the proper permissions are set on any new directory that you have created before moving the logs. The Administrator account needs Full Control, System needs Full Control, and Network Service needs Read, Write, and Delete Subfolders and Files.
Maximum Log and Directory Size
Although old message tracking log files are deleted after a configurable number of days (more on this later), the entire directory that contains all message tracking log files is subject to a default maximum size of 250MB. In other words, if the sum total of all message tracking log files within the log file directory exceeds 250MB, the oldest log files will be deleted.
As you might expect, this 250MB limit is configurable via PowerShell cmdlets. For example, the following cmdlet sets the maximum directory size to 500MB on server E2K7:
Set-TransportServer E2K7 –MessageTrackingLogMaxDirectorySize 500MB
You’ll notice that, to denote megabytes, the unit identifier MB has been entered after the numerical value of 500. It’s also possible to specify values in bytes (B), kilobytes (KB), gigabytes (GB) and terabytes (TB) making the setting of values very easy to comprehend.
So what about individual message tracking log files? Well, by default each log file can grow to a maximum size of 10MB before a new log file is created. Compare this to Exchange 2003, where a new log file was created each day. Once again, this setting can be altered via PowerShell cmdlets. The following example cmdlet sets the maximum log file size to 5MB on server E2K7:
Set-TransportServer E2K7 –MessageTrackingLogMaxFileSize 5MB
As per the directory size, it’s also possible to specify file size values in bytes, kilobytes, gigabytes and terabytes.
Maximum Log File Age
As you saw earlier in Figure 1, Exchange 2003 message tracking log files can be retained for a specified number of days which is extremely useful when you’re asked to troubleshoot why someone did not receive a message that was sent several days ago. In Exchange 2007, message tracking logs have an age limit of 30 days which I believe is a good figure to use if you’re not sure how long to keep your tracking logs for.
Should you wish to alter this setting, the cmdlet to run is:
Set-TransportServer SERVERNAME –MessageTrackingLogMaxAge DD.HH:MM:SS
As you can probably guess from the above cmdlet, it’s possible to set this age limit down to a specific number of days, hours, minutes and seconds. For example, to set the message tracking log maximum age to 15 days on server E2K7, the following cmdlet will need to be run:
Set-TransportServer E2K7 –MessageTrackingLogMaxAge 15.00:00:00
Subject Logging
Finally we reach the area of message tracking subject logging which gives you the ability to display the subject line of messages when tracking messages through the system. Those of you who know Exchange 2003 may remember that subject logging is disabled by default. As a change, Exchange 2007 now enables subject logging by default which I personally believe is a good move, since the majority of organizations use it. However, this change of default settings is one to watch for if your organization has a security policy that prohibits its use.
To disable message tracking subject logging on a server, the following cmdlet will be required:
Set-TransportServer SERVERNAME –MessageTrackingLogSubjectLoggingEnabled $false
Replace $false with $true to re-enable message tracking subject logging.
What’s In a Log?
You can see from Figure 1 below that the message tracking log directory is shown, together with two log files contained within it. Actually, what I should say is that a custom message tracking log directory is shown, since I used the cmdlets from part one of this article to change the message tracking log path to D:\Tracking Logs. The first thing that you’ll notice is the names of the log files. They are named in the following formats:
MSGTRKyyyymmdd-n.log
MSGTRKMyyyymmdd-n.log
MSGTRKMyyyymmdd-n.log
This format comprises the following information:
- MSGTRK prefix for log files found on Hub Transport or Edge Transport servers.
- MSGTRKM prefix for log files found on Mailbox servers.
- yyyy is a four digit representation of the year the log file was created.
- mm is a two digit representation of the month the log file was created.
- dd is a two digit representation of the day the log file was created.
- n is an incremental number that starts at 1 each day.
You can see from Figure 1 that I have log files beginning with both MSGTRK and MSGTRKM on the same server. You can therefore logically deduce that both the Hub Transport and Mailbox server roles are hosted on this single server. The first log file created is named MSGTRK20061217-1.log. Once that log file reaches its maximum size, which you’ll remember is 10MB by default, the next log created will be named MSGTRK20061217-2.log.

Figure 1: Log File Names
Figure 2 shows the contents of a sample message tracking log file taken from a Hub Transport server. The first thing you will notice is that the data is contained in Comma Separated Value (CSV) format. Compare this to the sample Exchange 2003 message tracking log shown in Figure 3.

Figure 2: Exchange 2007 Message Tracking Log File Contents

Figure 3: Exchange 2003 Message Tracking Log File Contents
You will see from Figure 2 that the first few lines of the log file contain system information about the log file. It contains the following headers in order: #Software, #Version, #Log-Type, #Date, #Fields. An explanation of these headers is as follows:
- #Software. This is the name of the application that created the log file, which is set to a value of Microsoft Exchange Server in our case here.
- #Version. This is the version number of the application that created the log file. In my testing on a trial version of Exchange 2007 RTM, this was set to 8.0.0.0. This was also the case on Exchange 2007 Beta 2.
- #Log-Type. This is the type of log file created by the application, which is set to Message Tracking Log in our case here.
- #Date. This is the date and time that the log file was created and is shown in the following format: yyyy-mm-ddThh:mm:ss.fffZ. You can almost certainly guess that yyyy refers to the year, the first mm to the month, and so on for the date, whilst hh refers to the hour, the second mm the minute and so on for the time.
- #Fields. This is a comma-delimited list of field names that are shown within the log file. The field names are, in order: date-time, client-ip, client-hostname, server-ip, server-hostname, source-context, connector-id, source, event-id, internal-message-id, message-id, recipient-address, recipient-status, total-bytes, recipient-count, related-recipient-address, reference, message-subject, sender-address, return-path, message-info.
I won’t detail the meaning of each field within this article as there is an excellent description within the Exchange 2007 help file. To be honest, with the exception of a few, most of the field names should be self-explanatory and if you enable message tracking and send a few messages, you should be able to work through each field value to determine what’s going on.
Searching a Log
As you may remember from part one of this article, it’s only possible to configure the message tracking log file settings by using the Exchange Management Shell (EMS); no method exists to configure the settings via the Exchange Management Console (EMC). If you prefer to use graphical tools when administering Exchange, then you’ll be pleased to know that you can use the Message Tracking tool to search the contents of the message tracking log files. Of course, you can also use the EMS but note that there are differences between the two. I’ll cover both methods here and indicate what these differences are later in the article.
First, let’s look at using the Message Tracking tool to search message tracking log files. There’s a reason I’m going to cover the Message Tracking tool first, and that’s simply because the corresponding cmdlet that you could have run is displayed within the Message Tracking tool, making it easy to use EMS next time. Here’s how to run the Message Tracking tool:
- Run the Exchange Management Console.
- In the left-hand pane, known as the Console Tree, select Toolbox.
- In the middle top pane, known as the Result Pane, select Message Tracking from the Mail flow tools area.
- Now you can either select the Open tool option from the right-hand pane, known as the Action Pane, or you can right-click Message Tracking in the Result Pane and choose Open tool from the context menu. By the way, if you don’t see the Action Pane, it may be because it is currently hidden via the View menu option within the EMC snap-in. Click View, then Customize… and in the Customize View window, ensure that the Action pane option is selected.
- A new window opens to reveal the Microsoft Exchange Troubleshooting Assistant. If this is the first time you’ve chosen this option, you may have to skip through a few screens on checking for updates. The end result should be the screen shown below in Figure 4.

Figure 4: Message Tracking Tool
Here you can fill in the relevant search filters, such as the sender, recipient(s), message subject and so on. There are several key things to note:
- At the bottom of this screen, the Exchange management shell command area shows you the corresponding cmdlet that you can run to produce the same search via EMS.
- Note from Figure 2 that the tracking logs store dates and times in the Coordinated Universal Time (UTC) format, whilst the search shown above in Figure 4 uses regional date and time formats. The Message Tracking tool does the conversion for you.
- The EventID search field has many different choices, such as RECEIVE, which is used to search for messages received by the relevant server, or DELIVER, which is used to search for messages delivered to a mailbox. See the Exchange 2007 help file for a detailed breakdown of the remaining choices here.
As an example, to perform a simple search for all messages containing “hello” within the subject line, you’ll need to perform at least two tasks in the screen shown above in Figure 4. First, you’ll need to click the Subject check box and supply the “hello” text in the field next to it. Second, you’ll need to ensure that the end date is later than the start date. By default, these dates are the same and failure to change the end date results in an error when performing the search. Also, in the case where you have separate Mailbox and Hub Transport servers and you’re performing the search from the Mailbox server, you’ll also need to change the EventID to the SUBMIT option, since Mailbox servers only contain the SUBMIT event. These are used to track when Mailbox servers submit messages to Hub Transport servers. You will no doubt recall from your Exchange 2007 reading that all messages pass through Hub Transport servers.
Assuming you’ve entered valid details and clicked the Next button, you should be presented with a screen similar to the one shown below in Figure 5.

Figure 5: Results Via Message Tracking Tool
Note the text that says Selected row will populate parameters for next message tracking search. This is a nice feature that does exactly what it says – whatever is selected, such as the message subject text in Figure 5, will be used as the basis of the next search when you click the Next button at the bottom of the screen.
One extra thing to note with message tracking is the dependency on the Microsoft Exchange Transport Log Search service. You may have already noted that on an Exchange 2007 server, there is a notable increase in the number of Exchange-related services displayed within the Services applet. Searching tracking logs requires that the Microsoft Exchange Transport Log Search service is running. If it isn’t running, you’ll see the error message shown in Figure 6. Note that if you do disable this service for whatever reason, the only thing affected is your ability to search the message tracking log files; no other Exchange function should be affected.

Figure 6: Message Tracking Search Error (EMC)
Now let’s look at using EMS to search message tracking log files. This functionality centers around using the Get-MessageTrackingLog cmdlet. You can use this cmdlet without any other options which will result in the last 1,000 message tracking log entries being shown. This may not prove too useful, so there are many parameters to add to the cmdlet to refine our search. You can limit the number of returned entries by using the ResultSize parameter. To repeat our previous search, we could simply paste in the cmdlet that the Message Tracking tool shows us. It is as follows:
Get-MessageTrackingLog –EventID “RECEIVE” –MessageSubject “hello” –Start “01/12/2006 00:00:00” –End “28/12/2006 18:50:00”
Note that in my example the start and end dates are displayed in UK format. Other than that, it should be fairly obvious what is being searched for. The result is as follows:

Figure 7: Message Tracking Results Via EMS
You’ll see from Figure 7 that the 5 default fields displayed are EventId, Source, Sender, Recipients and MessageSubject. If you use the format-list or fl formatting cmdlet, you can obtain much more information. For example, Figure 8 shows detailed information for the first search result listed above in Figure 7. Of course, you also have the option to re-direct the results of your cmdlet to a text file by appending something like > “C:\results.txt” to the end of your cmdlet.

Figure 8: Message Tracking Results Via EMS Using Format-List
The logical deduction is that it’ll more than likely make the most sense for you to use the Message Tracking tool first and see what the corresponding EMS cmdlets are. Once you’re comfortable with the relevant cmdlets, you may choose to use EMS solely. The choice is yours.
To complete our look at using the EMS to search message tracking log files, don’t forget that if the Microsoft Exchange Transport Log Search service isn’t running you’ll get an error in exactly the same way as you do within the Message Tracking tool. In the case of the EMS, you’ll see the self-explanatory error shown in Figure 9.

Figure 9: Message Tracking Search Error (EMS)
No comments:
Post a Comment