Exchange 2007 Message Queues
Exchange has always had a way of viewing the messages it was processing right back to the early days of Exchange 5.x, and possibly even Exchange 4.0. However, the ease with which this is possible and the functionality available to administrators have changed throughout the versions. This is again the case with the transition from Exchange 2003 to Exchange 2007. In Exchange 2007, the way queues work has changed fundamentally. We have moved away from the Exchange 2003 method where each SMTP virtual server had its own queue directory on an NTFS partition to Exchange 2007 using a standard Extensible Storage Engine (ESE) Database for its queue information. On top of that the user interface (UI) has changed completely in Exchange 2007 as it is now based on a new Microsoft Management Console (MMC) v3 snap-in. To highlight the UI difference, take a look at the screenshots below;
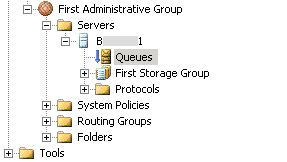
Figure 1: The location of Exchange 2003 Queues
In Exchange 2003 the UI for viewing queues made things fairly easy to find however, it had the drawback of only being able to monitor one server’s queues at one time.

Figure 2: Viewing queues in Exchange 2003
In Figure 2 you can easily see the queue type and its status. In this example you can see that there are several mails waiting to be sent which most likely are non-delivery reports (NDRs) from spam mails!
With Exchange 2007, the queues are viewed in a new tool called “Queue Viewer” which you can find alongside other utilities in the new Toolbox area, shown in Figure 3.

Figure 3: The new Toolbox area in Exchange 2007
When you open Queue Viewer, you can see that it is based on an MMC v3.0 snap-in as shown in Figure 4:

Figure 4: The Queue Viewer UI
The major benefit of this is that you can now create your own custom MMCs using the standalone viewer to monitor multiple Exchange 2007 servers at once:

Figure 5: Adding an MMC snap-in for Queue Viewer
Having looked at the UI changes, it is nearly time to move on to the fundamental theory of the queues in Exchange 2007; however, before I do there is one other piece of info which you should be aware of. Not all Exchange 2007 servers have queues! This is a big difference to Exchange 2003 where, because of the fact that all servers were involved in message transport, they all had an SMTP queue. In Exchange 2007 only Hub Transport and Edge Transport servers have queues.
Queue Theory
So where does this database fit in? Well as mentioned briefly above, all queue activity now occurs in a new ESE database. The main database file is called mail.que and by default can be found here:
C:\Program Files\Microsoft\Exchange Server\TransportRoles\data\Queue

Figure 6: Folder containing queue database files
The other files are in the locations as described below:
- Trn.chk - The checkpoint file.
- Trn.log - The current transaction log file.
- Trntmp.log - The next provisioned transaction log file that is created in advance.
- Trnnnn.log - Other transaction log files that are created when Trn.log reaches its maximum size.
- Trnres00001.jrs - The Reserve log file.
- Trnres00002.jrs - The Second Reserve log file.
- Temp.edb – Temp DB used to verify database schema on start-up.
You might wonder what happens with the logs in this scenario. Well, they are configured for circular logging with transaction logs being deleted after they have been committed.
Just before we move on to another area, it is worth stating how to move the queue databases. One important reason for moving the Queue DB and logs is performance. Another slightly less well known reason is that the drive on which the Queue DB and logs are stored must have 4GB or more free space otherwise the server will apply back pressure and start slowing the flow of messages!
When moving the DB, the usual rules for splitting transaction logs and DB files apply. To move the databases you must edit the EdgeTransport.exe.config file which by default is located at the location below and then stop and restart the msexchangetransport service:
C:\Program Files\Microsoft\Exchange Server\Bin\EdgeTransport.exe.config
The key thing to bear in mind before editing the config file is that the parent directory has the correct permissions as set up below; that way the directory will be created for you:
- Network Service: Full Control
- System: Full Control
- Administrators: Full Control
The relevant lines are shown below. To move the database, you should edit the line containing “QueueDatabasePath” and to move the logs, you should edit the line containing “QueueDatabaseLoggingPath”. You can see in Figure 7 that I have moved my DB and logs to H:
Figure 7: Editing the EdgeTransport.exe.config file
Having looked at the Database it is now time to understand what it contains. There are various different queues:
- Submissions: Used by the categorizer to gather all messages that have to be resolved, routed, and processed by Transport agents.
- Poison Message: The poison message queue is a special queue that is used to isolate messages that are detected to be potentially harmful to the Exchange 2007 system after a server failure.
- Remote Delivery: Remote delivery queues hold messages that are being delivered to a remote server by using SMTP.
- Mailbox Delivery: The mailbox delivery queues hold messages that are being delivered to a mailbox server by using encrypted Exchange RPC.
- Unreachable Destination: Each transport server can have only one Unreachable queue. The Unreachable queue contains messages that cannot be routed to their destinations.
Using Queues
Now that MMC v3 is used for queue viewer the UI is very simple. By default the queue viewer opens and displays the queues for the transport server that you are logged on to. To connect to another server use the Connect to Server task in the right hand action pane:

Figure 8: Showing Connect to Server
The main queue viewer window opens with two tabs along the top which show all queues and all messages by default. When you open a queue by double clicking, another tab appears showing only the messages in that queue:

Figure 9: Showing tabs in Queue Viewer
To manage the queues all you have to do is highlight the object to operate on and view the actions pane on the right hand side of the window as shown in Figure 9.
A key new Exchange 2007 queue viewer feature is message filtering. An example of how to use filtering is in the case of a spam attack. As an administrator you can take advantage of the "Bulk Action" feature, which applies an action to all messages that meet the parameters specified by the filter to remove spam messages with or without NDR.

Figure 10: The filtering UI shown in the messages tab

Figure 11: Some more filtering options
The other actions which you can perform in queue viewer are shown below:
- Suspend queue This action temporarily prevents delivery of messages that are currently in the queue.
- Resume queue The opposite of Suspend queue.
- Retry queue When a connection to the next hop for a queue fails, a retry timer is set. This forces an immediate connection attempt.
- Suspend message This action temporarily prevents delivery of a single message.
- Resume message The opposite of Suspend message.
- Remove message This action permanently prevents delivery of a message.
- Export message This action copies a message to the file path that you specify. The messages are not deleted from the queue, but a copy of the message is saved to a file location. Before you export a message, you must suspend the message in the queue.
Queues and PowerShell
Whilst I know that the whole of Exchange Management Console is based on PowerShell, something that was really highlighted even further was the error message I got when I had the queue viewer open and stopped the msexchangetransport service! You can see in Figure 12 the PowerShell commands that run to provide the output to the Queue Viewer UI.

Figure 12: PowerShell command error
It got me thinking about using PowerShell to manipulate the queues. To start off, I used the PowerShell command below to show all commands with Queue in the name:
get-command *queue*
Figure 13: get-command *queue*
Then I tried the same command this time looking for commands with “message” in them:

Figure 14: get-command *message*
Armed with a knowledge of available commands I began by running a simple get-queue command
Figure 15: get-queue
I then moved on to locate any queue with a message count of less than 100. In this example three queues are shown all with 0 messages. All but the submission queue will shortly be removed as their messages have been delivered. The submission queue is persistent and is therefore always present, waiting for mail to be categorized.
Figure 16: get-queue with a filter
As you can see, the simplicity of the PowerShell commands make manipulating the queues via script much easier than when using VBScript. Obviously the examples above are simple but they could be taken a lot further. For example, you could run the following to remove messages from queues which come from anything@spammer.com with an SCL rating higher than 5:
Remove-Message -Filter {FromAddress -like "*spammer.com*" -and SCL -gt 5} -withNDR $false
A quick tour of Queue Viewer in Exchange Server 2007
Queue Viewer wasn't left behind in the Administrative GUI facelift for Exchange Server 2007. You can find the GUI for monitoring mail-flow tucked away in the Toolbox of the Exchange Management Console. Unlike Exchange 2003, Exchange 2007's new Queue Viewer is a stand-alone MMC snap-in, which allows administrators to create custom views for managing multiple servers at once.

Once in the Queue Viewer tool, just connect to the server that you want to view. Queue Viewer will default to a connection to the local server unless you override this setting.
Exchange 2007's Queue Viewer groups queues and messages into three different views – all queues on the server, all messages in all queues (on the server), and all messages filtered for a specific queue. Queues can be suspended, resumed, retried, and cleared of all messages from the Queues view. The Queues view also displays valuable troubleshooting information, such as the Last Error and the Next Retry Time associated with each queue.

Although the third view is hidden by default, double-clicking on a specific queue reveals this third view - a list of all messages corresponding to the queue you clicked. In both this view and the Messages view, messages can be suspended, resumed, and removed. An administrator can also view a message's details and the details corresponding to the message's recipients.


Exchange 2007's Queue Viewer can be configured to automatically refresh the list of queues and messages, as well as adjust the size of the data set returned per page of results. For performance reasons, the maximum number of messages that can be showed in the Messages view per page is 10000 items, but there is no limit to the number of pages.

Queue Viewer also sports improved filtering capabilities, allowing filtering on any of the columns displayed. The filtering available in Exchange 2007 Queue Viewer is very similar in function to that found in the updated Exchange Management Console.
A great example of how to use this powerful, new filtering capability: in the case of a spam attack, administrators can take advantage of the "Bulk Action" feature, which applies an action to all messages that meet the parameters specified by the filter to remove these messages with or without NDR.

File-Level Antivirus Scanning on Exchange 2007
There are two types of file-level scanners:
- Memory-resident file-level scanning refers to a part of file-level antivirus software that is loaded in memory at all times. It checks all the files that are used on the hard disk and in computer memory.
- On-demand file-level scanning refers to a part of file-level antivirus software that you can configure to scan files on the hard disk manually or on a schedule. Some versions of antivirus software start the on-demand scan automatically after virus signatures are updated to make sure that all files are scanned with the latest signatures.
You must exclude specific directories for each Exchange server or server role on which you run a file-level antivirus scanner. This section describes the directories that you should exclude from file-level scanning for each server or server role.
Mailbox server role
· Exchange databases, checkpoint files, and log files across all storage groups. By default, these are located in sub-folders under the %Program Files%\Microsoft\Exchange Server\Mailbox folder. You can obtain the directory location by running the following commands in the Exchange Management Shell:
o To determine the location of a transaction log and checkpoint file, run the following command: Get-StorageGroup -server <servername>| fl *path*
o To determine the location of a mailbox database, run the following command: Get-MailboxDatabase -server <servername>| fl *path*
o To determine the location of a public folder database, run the following command: Get-PublicFolderDatabase -server <servername>| fl *path*
· Database content indexes. By default, these are located in storage group sub-folders under the %Program Files%\Microsoft\Exchange Server\Mailbox folder.
· General log files, such as message tracking log files. These files are located in subfolders under the %Program Files%\Microsoft\Exchange Server\TransportRoles\Logs folder and %Program Files%\Microsoft\Exchange Server\Logging folder. To determine the log paths being used, run the following command in the Exchange Management Shell: Get-MailboxServer <servername>| fl *path*
· The Offline Address Book files that are located in subfolders under the %Program Files%\Microsoft\Exchange Server\ExchangeOAB folder
· IIS system files in the %SystemRoot%\System32\Inetsrv folder
· The temporary folder that is used with offline maintenance utilities, such as Eseutil.exe. By default, this folder is the location where the .exe file is run from. However, you can configure where you perform the operation from when you run the utility.
· The temporary folders that are used to perform conversions:
o Content conversions are performed in the server’s TMP folder.
o OLE conversions are performed in %Program Files%\Microsoft\Exchange Server\Working\OleConvertor folder.
o The Mailbox database temporary folder: %Program Files%\Microsoft\Exchange Server\Mailbox\MDBTEMP
· Any Exchange-aware antivirus program folders
Hub Transport server role
· General log files, for example, message tracking. These files are located in subfolders under the %Program Files%\Microsoft\Exchange Server\TransportRoles\Logs folder. To determine the log paths being used, run the following command in the Exchange Management Shell: Get-TransportServer <servername>| fl *logpath*,*tracingpath*
· The message folders that are located under the %Program Files%\Microsoft\Exchange Server\TransportRoles folder. To determine the paths being used, run the following command in the Exchange Management Shell: Get-TransportServer <servername>| fl *dir*path*
· The transport server role queue database, checkpoint, and log files that are located in the %Program Files%\Microsoft\Exchange Server\TransportRoles\Data\Queue folder. For more information about how to obtain the directory location if the queue database files have been moved from the default location, see Working with the Queue Database on Transport Servers.
· The transport server role Sender Reputation database, checkpoint, and log files that are located in the %Program Files%\Microsoft\Exchange Server\TransportRoles\Data\SenderReputation folder
· The transport server role IP filter database, checkpoint, and log files that are located in the %Program Files%\Microsoft\Exchange Server\TransportRoles\Data\IpFilter folder
· The temporary folders that are used to perform conversions:
o Content conversions are performed in the server’s TMP folder.
o OLE conversions are performed in %Program Files%\Microsoft\Exchange Server\Working\OleConvertor folder.
· Any Exchange-aware antivirus program folders
Edge Transport server role
· The Active Directory Application Mode (ADAM) database and log files that are located in the %Program Files%\Microsoft\Exchange Server\TransportRoles\Data\Adam folder. For more information about how to obtain the directory location if the ADAM database files have been moved from the default location, see How to Modify ADAM Configuration.
· General log files, for example message tracking. These files are located in subfolders under the %Program Files%\Microsoft\Exchange Server\TransportRoles\Logs folder. To determine the log paths being used, run the following command in the Exchange Management Shell: Get-TransportServer <servername>| fl *logpath*,*tracingpath*
· The message folders that are located under the %Program Files%\Microsoft\Exchange Server\TransportRoles folder. To determine the log paths being used, run the following command in the Exchange Management Shell: Get-TransportServer <servername>| fl *dir*path*
· The transport server role queue database, checkpoint, and log files that are located in the %Program Files%\Microsoft\Exchange Server\TransportRoles\Data\Queue folder. For more information about how to obtain the directory location if the queue database files have been moved from the default location, see Working with the Queue Database on Transport Servers.
· The transport server role Sender Reputation database, checkpoint, and log files that are located in the %Program Files%\Microsoft\Exchange Server\TransportRoles\Data\SenderReputation folder
· The transport server role IP filter database, checkpoint, and log files that are located in the %Program Files%\Microsoft\Exchange Server\TransportRoles\Data\IpFilter folder
· The temporary folders that are used to perform conversions:
o Content conversions are performed in the server’s TMP folder.
o OLE conversions are performed in %Program Files%\Microsoft\Exchange Server\Working\OleConvertor folder.
· Any Exchange-aware antivirus program folders
Client Access server role
· The Internet Information Services (IIS) 6.0 compression folder that is used with Microsoft Outlook Web Access. By default, the compression folder in IIS 6.0 is located at %systemroot%\IIS Temporary Compressed Files.
For more information, see the Microsoft Knowledge Base article 817442, A 0-byte file may be returned when compression is enabled on a server that is running IIS.
For more information, see the Microsoft Knowledge Base article 817442, A 0-byte file may be returned when compression is enabled on a server that is running IIS.
· IIS system files in the %SystemRoot%\System32\Inetsrv folder
· The Internet-related files that are stored in the sub-folders of the %Program Files%\Microsoft\Exchange Server\ClientAccess folder
· The temporary folder that is used to perform content conversion. By default, this is the server’s TMP folder.
Unified Messaging server role
· The grammar files that are stored in the subfolders in the %Program Files%\Microsoft\Exchange Server\UnifiedMessaging\grammars folder
· The voice prompts that are stored in the subfolders in the %Program Files%\Microsoft\Exchange Server\UnifiedMessaging\Prompts folder
· The voicemail files that are stored in the %Program Files%\Microsoft\Exchange Server\UnifiedMessaging\voicemail folder
· The bad voicemail files that are stored in the %Program Files%\Microsoft\Exchange Server\UnifiedMessaging\badvoicemail folder
Exchange 2007: Free Busy Not Available for 2003 Users
Summary: Exchange 2007 users cannot view Free Busy for users on Exchange 2003
Resolution: Copy the Free Busy System from to Exchange 2007.
1. Open Exchange 2003 System Manager.
2. Scroll to Administrative Groups and Folders
3. Right click Public Folders - View System Folders
4. Expand Schedule + Free Busy
5. You should see Free Busy subfolders starting with EX: Right click each one properties, replication tab. Add your Exchange 2007 server.
Let it replicate and check 15-30 minutes.
Free busy not working exchange 2007
Here we go again with another Microsoft Exchange 2007 piece. Luckily I am finished with my Exchange 2007 project, so I can get back to writing a little. Since Exchange 2007 took some getting used to, I thought I would share with you some of the stuff I discovered along the way.
One problem we had was that after doing our setup, users could not access Free/Busy information from Outlook 2007. If they logged into OWA (Outlook Web Access) they could see it fine. For this type of issue there are two things you can check. I will start with the easiest.
If your Outlook 2007 users cannot view Free/Busy information, try the following on your Microsoft Exchange 2007 server:
- Go to Start > Administrative Tools > Internet Information Services (IIS) Manager
- Expand your way down to Default Web Site and locate EWS
- Click on EWS, then double click on Authentication. The default setting should be Windows Authentication Enabled
- Expand EWS, and click on BIN. Now click on Authentication. The default setting should be Windows Authentication Enabled
- If you had to enable with any of these settings, run the command prompt as Administrator and run iisreset /noforce
Now close out of Outlook on your client workstation, and run Outlook /cleanfreebusy. Open/create a new calendar entry and add a user to it. Look at the Scheduling assistant to see if you can see free/busy information. If you can’t, there is one more thing you can check.
If you migrated users from an Exchange 2003 server, chances might be good that you did not migrate over the Free/Busy public folder information correctly. To check open the Exchange Management Shell (EMS) as administrator and run the following command:
Get-PublicFolder -server CASSERVER "\non_ipm_subtree\SCHEDULE+ FREE BUSY" -recurse | Format-List
You will see a bunch of information, but what you are looking for is two Public folder groups:
- \NON_IPM_SUBTREE\SCHEDULE+ FREE BUSY\EX:/o=Company/ou=First Administrative Group - AND
- \NON_IPM_SUBTREE\SCHEDULE+ FREE BUSY\EX:/o=Company/ou=Exchange Administrative Group (FYDIBOHF23SPDLT)
In my case, we were missing the First Administrative Group. To add it I ran the following from EMS:
Set-PublicFolder –Identity “\NON_IPM_SUBTREE\SCHEDULE+ FREE BUSY\EX:/o=Company/ou=First Administrative Group” –Replicas “CASSERVER\Public Folder Database”
Let that simmer (replicate) through your domain for a while, then go back and try your Outlook /freebusy fix again. You should be good to go.
Unable to clean your local free/busy information
I ran into this issue a few months ago and now that I have my blogged kicked off, I have a couple things I need to catch up on posting here…so here goes another one:
We had just migrated some mailboxes from one E2K3 SP2 server to another E2K3 SP2 server. A couple users reported that their free/busy information was not being updated and they were receiving the error “Unable to update your free/busy information” when creating new appointments or accepting meeting requests.
Well, normally, this is an easy fix. You do one of 2 things:
1. Run a /cleanfreebusy
2. Manually remove the user’s Free/Busy folder
1. Run a /cleanfreebusy
2. Manually remove the user’s Free/Busy folder
The issue came up when I did Step 1. I received a message I had never seen and could find very little reference to it on the web: “Unable to clean your local free/busy information” The key word here is LOCAL. This post doesn’t apply if you don’t have the word LOCAL.
So I proceeded to some of the more advanced free/busy troubleshooting steps:
1. Check for uppercase characters in the free/busy message
2. Check the SiteFolderServer setting
3. Recreated the calendar folder
1. Check for uppercase characters in the free/busy message
2. Check the SiteFolderServer setting
3. Recreated the calendar folder
Still, not working…so I open a PSS case. PSS had only seen a couple instances of this case and the final fix had been to exmerge the mailbox out, delete the mailbox, recreate the mailbox, and exmerge the data back in. I didn’t want to go with that answer because we had several more migrations to go and this would be a lot of overheard if we had to do it regularly.
So worked with PSS some more and finally off of something they said, got a crazy idea…and it worked! So here what is was…it appears to be some problem with the MAPI property PR_FREEBUSY_ENTRYIDS.
You can fix this problem with the MAPI Editor Tool (the tool formerly known as MFCMapi). You will need to create an Outlook profile for the mailbox you want to repair:
1. Choose Session and Logon and Display Store Table
2. Choose the Outlook profile you created
3. Double click the Instance that starts with “Mailbox -”
4. Expand Root – Mailbox
5. Click on IPM_SUBTREE
6. In the right window, if there is a property name of PR_FREEBUSY_ENTRYIDS, right click on it and choose Delete Property (if it exists here…it may not)
7. Expand IPM_SUBTREE
8. Click on Inbox
9. In the right window, if there is a property name of PR_FREEBUSY_ENTRYIDS, right click on it and choose Delete Property
10. Exit out of MAPI Editor.
11. Rerun /cleanfreebusy on the mailbox.
This should resolve the issue…at least it did in our case. I hope this helps someone else and please post a comment if you used this post…I would be interested to know if others experience this! Thanks!
The routing of a message determines the type of queue in which a message is stored. The following types of queues are used in Exchange 2007:
- Submission queue
- Mailbox delivery queue
- Remote delivery queue
- Poison message queue
- Unreachable queue
You use the Queue Viewer or commands in the Exchange Management Shell to view information about queues and messages. You can also use these tools to perform the following intrusive actions:
- Suspend queue
- Resume queue
- Retry queue
- Suspend message
- Resume message
- Remove message
- Export message
- Open the Exchange Management Console.
- In the console tree, click Toolbox.
- In the result pane, click Exchange Queue Viewer.
- In the action pane, click Open Tool.
- In the Queue Viewer, click the Queues tab. A list of all queues on the server to which you are connected is displayed.
- Click Create Filter, and enter your filter expression as follows:
- Select Status from the queue property drop-down list.
- Select Equals from the comparison operator drop-down list.
- Select Suspended from the value drop-down list.
- Click Apply Filter. All queues on the server that are currently suspended are displayed.
- Select one or more queues from the list, right-click, and then select resume.
- Open the Exchange Management Console.
- In the console tree, click Toolbox.
- In the result pane, click Exchange Queue Viewer.
- In the action pane, click Open Tool.
- In the Queue Viewer, click the Messages tab. A list of all messages on the server to which you are connected is displayed. To adjust the action to focus on a single queue, click the Queues tab, double-click the queue name, and then click the Server\Queue tab that appears.
- Click Create Filter, and enter your filter expression as follows:
- Select Status from the message property drop-down list.
- Select Equals from the comparison operator drop-down list.
- Select Suspended from the value drop-down list.
- Click Apply Filter. All messages that have a status of Suspended are displayed.
- Select one or more messages from the list, right-click, and select Resume.
To use the Queue Viewer to remove a message from a queue
- Open the Exchange Management Console.
- In the console tree, click Toolbox.
- In the result pane, click Exchange Queue Viewer.
- In the action pane, click Open Tool.
- In the Queue Viewer, click the Messages tab. A list of all messages on the server to which you are connected is displayed. To adjust the action to a single queue, click the Queues tab, double-click the queue name, and then click the Server\Queue tab that appears.
- Select one or more messages from the list, right-click, and then select Remove Messages (with NDR) or Remove Messages (without NDR). A dialog box appears that confirms the selected action and asks, Do you want to continue? Click Yes.
- To remove all messages from a particular queue, click the Queues tab. Select a queue, right-click, and select Remove Messages (with NDR) or Remove Messages (without NDR). A dialog box appears that confirms the selected action and asks, Do you want to continue? Click Yes.
To use the Queue Viewer to resume a message in the poison message queue
- Open the Exchange Management Console.
- In the console tree, click Toolbox.
- In the result pane, click Exchange Queue Viewer.
- In the action pane, click Open Tool.
- In the Queue Viewer, click the Queues tab. A list of all queues on the server to which you are connected is displayed.
- Click the poison message queue. In the action pane, select View Messages.
- Select one or more messages from the list, right-click, and select Resume.
How Exchange 2007 E-Mail Address Policies and Accepted Domains Relate to Exchange 2003 Recipient Policies
The e-mail address recipient policy in Microsoft Exchange 2003 has been separated into two concepts in Microsoft Exchange Server 2007:
- E-mail Address Policies (EAP)
- Accepted Domains
E-Mail Address Recipient Policies in Exchange 2003
In Exchange 2003, there are two kinds of recipient policies:
- E-mail address recipient policies
- Mailbox manager recipient policies.
Mailbox manager recipient policies are not the focus of this topic and will not be described in detail.
The e-mail address recipient policy in Exchange 2003 combines the concepts of EAP and accepted domains. However, the following problems exist with this combined approach:
- Assume that a domain is specified for an e-mail address recipient policy, but the domain is not set as an authoritative domain. In this scenario, e-mail messages that are sent to recipients who have e-mail addresses that are defined by the policy are not routed within the Exchange organization for this domain. This is an invalid scenario, but the Exchange System Manager (ESM) does not block it.
- This Exchange organization is responsible for all mail delivery to this address check box, also known as the authoritative domain check box, is included under the e-mail address recipient policy user interface and is not very discoverable.
- Relay domains are managed by using the Connector user interface, which is in a different location than authoritative domain management. This issue can increase management complexity.
To avoid these problems, the e-mail address recipient policy concept is separated into EAP and accepted domains in Exchange 2007.
To set the specified domain as an authoritative domain in Exchange 2003
- Open the Exchange System Manager.
- Expand Recipients.
- Click Recipient Policies.
- Right-click Default Recipient Policy, and then select Properties.
- Click the E-Mail Addresses tab, and then click New.
- In the New Email Address dialog box, select SMTP.
- In the Address box, enter the SMTP domain name that you want to create.
- To make the specified domain authoritative, click to select the This Exchange Organization is responsible for all mail delivery to this address check box.
EAP defines the e-mail proxy addresses that are stamped onto recipient objects. Accepted domains define the SMTP namespaces that an Exchange organization uses to route e-mail messages. Any accepted domain that is added to the system can be mapped to an EAP to generate recipient e-mail addresses for the newly accepted domain. Every EAP must link to an existing accepted domain. This allows e-mail messages that are sent to e-mail addresses that are defined by the EAP to be routed by Exchange 2007 transport servers.
In Exchange 2007, authoritative and relay domains are managed together as accepted domains. You can use the Exchange 2007 Management Console to view and manage all accepted domains.
To view all accepted domains by using the Exchange 2007 Management Console
- In the Exchange 2007 Management Console, expand Organization Configuration, and then click Hub Transport.
- In the details pane, click the Accepted Domains tab to view all accepted domains and authoritative domains that are defined in the organization.
You can use the Exchange 2007 E-Mail Address Policy Wizard to select an accepted domain in which a new e-mail address policy can be applied. Only accepted domains that are defined in the Exchange 2007 organization can be added to the list in the EAP.
Troubleshooting Mail Flow from Exchange Server 2007 to Exchange 2000 or Exchange 2003 in the Same Organization
To use ADSI Edit to change the FQDN to the correct name
- Install ADSI Edit.
- Launch ADSI Edit. Click Start, click Run, type adsiedit.msc in the text box, and then click OK.
- Locate the servicePrincipalName attribute for the Exchange 2003 or Exchange 2000 server by going to this location: CN=Computers under Domain Configuration.
- Right-click the Exchange 2003 or Exchange 2000 server, and then click Properties.
- Select the servicePrincipalName attribute for this Exchange 2003 or Exchange 2000 server.
- Determine the value in the format of SMTPSVC/FQDN and make sure the FQDN is correct. If the FQDN is incorrect, change it to the correct FQDN.
- In Exchange System Manager on the Exchange 2003 or Exchange 2000 server, click the SMTP virtual server that you want to configure.
- On the Action menu, click Properties.
- Click the Delivery tab, and then click Advanced.
- In the Advanced Delivery dialog box, type the same FQDN as the one you identified in the servicePrincipalName attribute.
- Click OK to close the virtual server properties.
- Stop, and then restart the SMTP service.
- Click OK, and then close ADSI Edit.
Troubleshooting Mail Flow from Exchange 2007 to Exchange 2003 When E-Mail Messages are Stuck in the Queue
This topic discusses how to troubleshoot mail flow issues between Microsoft Exchange Server 2007 and Exchange Server 2003 and between Exchange 2007 and Exchange 2000 Server. After you install Exchange 2007 in your Exchange 2003 or Exchange 2000 organization, you may observe the following issues:
- Mail does not flow from Exchange 2007 to Exchange 2003 or Exchange 2000. However, e-mail messages can be sent from Exchange 2003 or Exchange 2000 to Exchange 2007.
- When you check the queue viewer in Exchange 2007, e-mail messages are stuck in the Unreachable domain queue on the Exchange 2007 side.
- When you double-click an e-mail message to view the properties, you receive the following error message: "There is currently no route to the mailbox database."
- Outlook clients can log in, but they cannot send or receive mail. Outbound messages remain in the Outbox.
- Messages are queued in the MapiDelivery queue on an Exchange 2007 Hub server. The queue is in a Ready state but there are messages stuck in the queue. Additionally, the message status shows the following error:
"430 4.2.0 STOREDRV; mailbox logon failure." - Messages that are sent from an Exchange 2007 mailbox are routed to the Unreachable destination queue on an Exchange 2007 Hub server. Additionally, the message status shows the following error:
"The mailbox recipient does not have a mailbox database." - You cannot authenticate your credentials with the SMTP Service by using BASIC (AUTH LOGIN) or SPA (AUTH GSSAPI)
Resolution
To resolve this issue, use one of the following methods:
- Add inheritable permissions to the appropriate mailbox store object, and make sure that the Exchange 2000 Servers group has the appropriate permissions.
- Use Active Directory Service Interfaces (ADSI) Edit to create the Folder hierarchies container under the administrative group in Exchange Server 2007.
- Grant the explicit Allow permission to the Exchange Servers permissions group on the Exchange server object in Active Directory.
To perform this procedure, the account you use must be delegated membership in the local Administrators group. For more information about permissions, delegating roles, and the rights that are required to administer Exchange 2007, see Permission Considerations.
- On the Exchange 2007 server on which the messages are queuing, obtain the latest routingconfig@<time_stamp>.xml file.
- Open the file using Notepad, and search for the HomeMdbRouting section.
- Verify that there is a listing for the message recipient's mailbox store. Find the appropriate Exchange 2003 server(s).
- In the Exchange 2003 Exchange System Manager, locate the properties of the Exchange 2003 server object, open the Security tab, and then make sure the Exchange Servers group has the following permissions:
- Read
- Access Recipient Update Service
- Administrator information store
- Create name properties in the information store
- Exchange Web Services Impersonation
- Exchange Web Services Token Serialization
- Modify public folder replica list
- Open mail send queue
- Read metabase properties
- Send As
- View Information Store status
- Click Advance, and then select the Allow inheritable permissions check box.
- Repeat steps 4 through 5 for each mailbox store object under this Exchange 2003 server.
- Restart the Microsoft Exchange Transport service on the Exchange 2007 server to update routing tables.
- Start ADSI Edit.
- Expand the following container:
Configuration [<Your_Domain_Name>]/CN=Configuration, DC=<Your_Domain_Controller> ,DC=com/CN=Services/CN=Microsoft Exchange/CN=<Your_Organization_Name>,CN=Administrative Groups
- Right-click CN=<Your_Administrative_Group_Name>, point to New, and then click Object.
- Click msExchPublicFolderTreeContainer in the Select a class list, and then click Next.
- In the Value box, type Folder Hierarchies, and then click Next.
- Click Finish.
- Determine whether the msExchPFOwningPFTree attribute on the public folder store is associated with a public folder tree. To do this follow these steps:
- In ADSI Edit, expand the following container:
Configuration [<Your_Domain_Name>]/CN=Configuration, DC=<Your_Domain_Controller>,DC=com/CN=Services/CN=Microsoft Exchange/CN=<Your_Organization_Name>/CN=Administrative Groups/CN=<Your_Administrative_Group_Name>/CN=Servers/CN=<Your_Server_Name>/CN=Information Store/CN=<Your_StorageGroup_Name>. - In the right-pane, right-click CN=Public folder store, and then click Properties.
- In the Attributes list, locate the msExchOwningPFTree attribute. The value provides the location of the public folder tree. If the attribute does not have a value, or the value is incorrect, go to step 8.
- Expand the container that is identified in the msExchOwningPFTree attribute value.
- Right-click CN=Public folders, and then click Move.
- In the Container to move object to dialog box, click Folder hierarchies, and then click OK.
- If the public folder store is not associated with a public folder tree, create a new tree. To do this, follow these steps:
- Right-click CN=Folder Hierarchies, point to New, and then click Object.
- In the Select a class list, click msExchPFTree, and then click Next.
- In the Value box, type Public Folders, and then click Next.
- Click More Attributes.
- In the Select a property to view list, click msExchPFTreeType, type 1 in the Edit Attribute box, and then click Set.
The value must be set to 1 to so that Exchange identifies this as a MAPI Tree.
|
- Click OK, and then click Finish.
- Populate the msExchOwningPFTreeBL attribute object of the public folder stores in the organization. To do this, follow these steps:
- In ADSI Edit, right-click the public folder tree that you created, and then click Properties.
- In the Attributes list, click distinguishedName, and then click View.
- Copy the value in the Value box to the clipboard, and then click Cancel two times.
- Expand the Storage group container that contains the public folder store for the server, right-click the server and then click Properties.
- In the Attributes list, click msExchOwningPFTree, and then click Edit.
- Click Clear, paste the value that you copied to the clipboard in the Value box, and then click OK.
- Close ADSI Edit, and then restart the Information Store Service.
- Start ADSI Edit.
- Expand the Exchange server object.
- If you are running Exchange Server 2007, expand the following container:
CN=Configuration/CN=Services/CN=Microsoft Exchange/CN=<YourDomain>/CN=Administrative Groups\CN=Exchange Administrative Group/CN=Servers - If you are running Exchange Server 2003, expand the following container:
CN=Configuration/CN=Services/CN=Microsoft Exchange/CN=Administrative Group/CN=First Administrative Group/CN=Servers - In the right pane, right-click the name of the server, and then click Properties.
- On the Security tab, click Advanced.
- On the Permissions tab, click the Name column header to sort the columns by name.
- In the Name column, locate the security settings that start with Exchange Servers.
- In the Permission column, locate the following permissions for the Exchange Servers security settings, and determine whether the setting in the Type column is set to Deny:
- Store Constrained Delegation
- Store Read and Write Access
- Store Read only Access
- Store Transport Access
- If permission is set to Deny, click the setting, click Edit, click to select the Allow check box for the permission, and then click OK.
- After the permissions identified in step 7 are set to Allow, click OK two times, and then close ADSI Edit.
Outlook Clients Can't Connect and Are Prompted for Authentication Repeatedly
This is because Internet Information Services (IIS) 7.0, the Web server role in Windows Server 2008, has kernel mode enabled by default for Integrated Windows authentication.
For clients to connect by using Outlook Anywhere when the Exchange 2007 SP1 Client Access server is running on Windows Server 2008, kernel mode must be disabled for Integrated Windows Authentication on IIS.
To perform the following procedures, the account you use must be delegated the Exchange Organization Administrator role. You must have an administrator account or be a member of the Administrators group on the computer that is running Windows Server 2008, and you must have read-write access permissions to the following target server-level configuration files: Machine.config, the root Web.config file (in the .NET Framework directory), and ApplicationHost.config.
If you are running 64-bit Windows, use Appcmd.exe from the LocalDrive\system32\inetsrv directory, not the LocalDrive\syswow64\inetsrv directory.
Disable kernel mode in Integrated Windows authentication on the computer running the Exchange 2007 SP1 Client Access server role on Windows Server 2008
- Click Start > Run.
- In the Open box, type cmd, and then press Enter.
- Type the following command:
%systemroot%\system32\inetsrv\AppCmd.exe set config /section:system.webServer/security/authentication/windowsAuthentication /useKernelMode:false /commit:apphost
If legacy Entourage clients exist in your organization, or you have users that connect to Outlook Web Access by using an /exchange virtual directory, you must repeat these steps on all Exchange 2007 Mailbox servers that have IIS 7 installed.
|
Stop and start IIS on the Exchange 2007 SP1 Client Access server running Windows Server 2008
- Click Start > Run.
- In the Open box, type the following file path, and then press Enter:
%windir%\system32\inetsrv
- Right-click Appcmd.exe, and then click Run as administrator.
- Type the following commands to stop IIS at the site level:
5. Stop Site MySite
Set Site MySite /serverAutoStart:false
- Type the following commands to start IIS at the site level:
7. Start Site MySite
Set Site MySite /serverAutoStart:true
No Confirmation Received That a Resource Has Accepted an Invitation When You Schedule a Meeting
This topic explains how to troubleshoot problems receiving meeting request confirmations from resource mailboxes. You can add a resource to a meeting request in Microsoft Office Outlook 2007 by doing one of the following:
- Select the resource from the Select Attendees and Resources dialog box and click Resources. You can open the Select Attendees and Resources dialog box by clicking To in the appointment view or by clicking Add Attendees in the scheduling assistant view.
- Select the resource from the Select Rooms dialog box and click Rooms. You can open the Select Rooms dialog box by clicking Rooms in the appointment view or Add Rooms in the scheduling assistant view.
- Type the name of the resource in the All Attendees list in the scheduling assistant view.
After sending the meeting request to the resource, you may not receive a response stating whether the resource was successfully booked.
|
This issue occurs if one the following is true:
- The resource mailbox is on a server that is running Microsoft Exchange Server 2007.
- The resource mailbox is not configured to automatically accept meeting requests.
This issue can be resolved by configuring the resource mailbox to automatically accept incoming meeting requests. By default, resource mailboxes are configured to automatically update their calendars. This means that the resource calendar is automatically updated with incoming meeting requests but no responses are sent. To enable resource booking, which enables the resource mailbox to send responses to incoming meeting requests, you must configure the resource mailbox to automatically accept incoming meeting requests. For detailed steps about configuring a resource mailbox to automatically accept incoming meeting requests, see How to Enable or Disable Automatic Booking on a Resource Mailbox.
Users Cannot Enable Out Of Office Assistant When Using Outlook 2007
This topic provides information about how to troubleshoot the Out of Office Assistant when using Microsoft Office Outlook 2007. In Microsoft Exchange Server 2007, you cannot enable the Out of Office Assistant if you are using Outlook 2007 with a profile for a mailbox that is not the same as the mailbox for the currently logged-on user. You may receive the following error message: "The Out Of Office Assistant cannot be displayed. Your server could not be located."
This issue occurs when the currently logged-on user's credentials do not match the credentials of the user whose mailbox is being accessed. Therefore, Outlook 2007 doesn't allow access to the mailbox.
To resolve this issue, use Microsoft Office Outlook Web Access to access your mailbox, and then enable the Out of Office Assistant via the Options page. For more information about enabling or disabling the Out of Office feature using Outlook Web Access, see How to Use Outlook Web Access to Turn On and Turn Off the Out of Office Feature.
Exchange 2007 Users Unable to See Free/Busy Information for Mailboxes on Exchange 2003 Server
The two causes of the problem are as follows:
- By default, the option "Require secure channel (SSL)" is selected on the certification authority (CA) server public folder virtual directory. This issue can occur if the common name on the certificate doesn't match the fully qualified domain name (FQDN) of the URL that is stored on the InternalURL attribute of Exchange Web Service.
- Forms-based authentication is enabled on Exchange Server 2003. For more information about forms-based authentication, see How to Configure Forms-Based Authentication for Outlook Web Access.
To resolve the problem, use one or more of the following resolutions, as applicable to the situation in your organization.
To modify the InternalURL attribute
- On the Client Access server, open Internet Information Services (IIS) Manager.
- Under Default Web Site, go to the Public virtual directory.
- Right-click Public, and then click the Properties page.
- On the Directory Security tab, click View Certificate, and note the "Issued to" name, for example, mail.contoso.com.
- Start Exchange Management Shell.
- Modify the InternalURL attribute by typing the following cmdlet and then pressing Enter: Set-WebServicesVirtualDirectory -Identity "CAS_Server_Name\EWS (Default Web Site)" -InternalURL https://mail.contoso.com/ews/exchange.asmx
- Restart IIS Admin Service.
To disable forms-based authentication
- Open Exchange System Manager.
- In the console tree, expand Servers, expand the server for which you want to disable forms-based authentication, and then expand Protocols.
- Expand HTTP, right-click Exchange Virtual Server, and then click Properties.
- In the Exchange Virtual Server Properties dialog box, on the Settings tab, in the Outlook Web Access pane, clear Enable Forms Based Authentication.
- Click Apply, and then click OK.
- Restart IIS Admin Service.
An Exchange 2007 Server Stops Responding to a MAPI Client
This problem may occur if a MAPI client opens more than the maximum number of server objects. In Exchange 2007, the number of server-side objects that are allowed to be opened by a single MAPI session is limited. This behaviour prevents a single MAPI client from exhausting resources on the Exchange server.
When an Exchange 2007 server stops responding to a MAPI client and generates Event 9646, it indicates that a MAPI client may be opening too many objects or may be leaving too many objects open on the server.
The following table lists the default values for the maximum number of server objects that can be opened at one time in Exchange 2007.
Default values of the maximum number of open server objects
Entry
|
Default value
|
objtMessage
|
250
|
objtFolder
|
500
|
objtAttachment
|
500
|
objtFolderView
|
500
|
objtMessageView
|
500
|
objtAttachView
|
500
|
objtStream
|
250
|
objtACLView
|
50
|
objtRulesView
|
50
|
objtFXSrcStrm
|
50
|
objtFXDstStrm
|
50
|
objtCStream
|
50
|
objtNotify
|
500,000
|
To resolve the problem, do the following:
- Investigate any third-party applications or add-ins that are running on the MAPI client. Some third-party applications keep objects open for long periods of time or open many objects concurrently.
- Investigate the user behaviour that is associated with the indicated logon. This will help you better understand why the default number of objects is insufficient.
- In rare cases, you may need to add a registry key to adjust the maximum number of open objects. This new registry key will override the default value. Such rare cases include situations in which it is acceptable or necessary to use applications that keep objects open or open many objects concurrently.
When you increase the maximum number of an object type, you also increase the memory that may be consumed by all client requests connecting to the server. Incorrectly configuring this value could lead to out-of-memory warnings or virtual memory fragmentation warnings.
|
Incorrectly editing the registry can cause serious problems that may require you to reinstall your operating system. Problems resulting from editing the registry incorrectly may not be able to be resolved. Before editing the registry, back up any valuable data.
|
To perform the following procedure, the account you use must be delegated membership in the local Administrators group. For more information about permissions, delegating roles, and the rights that are required to administer Exchange 2007, see Permission considerations.
- Start Registry Editor (regedit).
- Locate the following registry subkey: HKEY_LOCAL_MACHINE\SYSTEM\CurrentControlSet\Services\MSExchangeIS\ParametersSystem
- Right-click ParametersSystem, point to New, and then click Key.
- Type MaxObjsPerMapiSession, and then press ENTER to name the new subkey.
- Right-click MaxObjsPerMapiSession, click New, and then click DWORD Value.
- Type the object type, and then press ENTER to name the entry. For example, type objtMessage, and then press ENTER to create an entry that changes the default maximum of objtMessage objects.
- Right-click the entry that you created in Step 6, and then click Modify.
- In the Value data box, type the new maximum number of objects to which you want to limit this entry, and then click OK.
Event IDs 1005 and 2114 Indicate the Information Store Service and System Attendant Service Fails to Start
The Application event log may also include Event ID messages related to error 1005 and 2114.
This issue may occur because a new site has been created in Active Directory Sites and Services, where previously there had only been a Default-First-Site-Name. In addition, the subnet in which the Exchange Server 2007 server resides is not associated with any site in Active Directory Sites and Services.
To resolve the problem, create a new subnet and add the Exchange 2007 IP address.
Procedure
- Click Start, click Programs, point to Administrative Tools, and then click Active Directory Sites and Services.
- Double-click the Sites node that corresponds to the site where the Exchange server resides. Right-click Subnets.
- Click New Subnet on the shortcut menu.
- Type the IP address and the subnet mask of the subnet, and then click One Site on the Site Name list.
- Click OK to close the New Object-Subnet dialog box.
- Force Active Directory replication. For more information about forcing replication, see Force replication over a connection.
Cannot Close Exchange Management Console While Wizard is Completing Scheduled Task
In the Exchange Management Console, you can set a schedule for some of the wizards and delay when the task is to run. However, if you set the schedule in the wizard, you cannot close the Exchange Management Console until the task has completed. You can set the schedule for the following wizards:
- Apply Address List wizard
- Edit Address List wizard
- New Address List wizard
- Apply E-mail Address Policy wizard
- Edit E-mail Address Policy wizard
- New E-mail Address Policy wizard
- Move Mailbox wizard
If you attempt to close the Exchange Management Console while the wizard is open, you will receive the following error:
You must close all dialog boxes before you can close the Exchange Management Console.
As shown in the following graphic, the task is scheduled to run at some time in the future. To close the Exchange Management Console, your only option is to cancel the task.


This issue can be resolved by using the At command in the Exchange Management Shell to schedule the task. This will ensure that the task runs as scheduled, even if the Exchange Management Console cannot be left open.
To use the at command in the Exchange Management Shell to schedule a task
- To use the at command to schedule when the address list Marketing should be applied, run the following command.
At 16:00 /interactive powershell.exe -noexit -psconsolefile "C:\Program Files\Microsoft\Exchange Server\Bin\exshell.psc1" -command "Update-AddressList -Identity Marketing"
The path of exshell.psc1 is dependent on where Microsoft Exchange is installed. Verify the location of your Exchange installation before running the command.
|
Exchange Management Console Unable to Connect to Active Directory with Event ID 40960
If this error occurs, event log errors are generated with the following information:
Event ID: 40960
Event Source: LSASRV
Event Type: Warning
Description: The Security System detected an authentication error for the server ldap/WORKSTATION1. The failure code from authentication protocol Kerberos was "There are currently no logon servers available to service the logon request."
|
This issue can be caused by the following:
- Kerberos authentication is not available or is not working correctly between the administrative workstation and the domain controller.
- The Kerberos protocol requires that all computer clocks be synchronized to within five minutes of each other.
- The administrative workstation is not a member of a domain, or there is a problem with its domain membership.
- An invalid user name or password has been stored on the administrative workstation for use when connecting to a particular domain controller. This stored credential is overriding your current logon credentials. In Microsoft Windows Server 2003, you can store credentials by using the Stored User Names and Passwords applet in Control Panel.
- Intermittent network connectivity issues.
To resolve the problem, do one or all of the following:
- Ensure that Kerberos authentication is functioning correctly. For more information about Kerberos authentication, see Kerberos Authentication in Windows Server 2003 and Kerberos Authentication Technical Reference.
- Ensure that all computer clocks are synchronized to within five minutes.
- Ensure that you are not having network connectivity problems.
Cannot Use the Exchange Management Console to Mail-Enable Users
When you try to use the Microsoft Exchange Server 2007 Management Console to mail-enable users in a child domain, you cannot locate the appropriate users.
Resolution
By default, the scope for the Recipient Configuration object is that of the parent domain in which Exchange 2007 is installed. To mail-enable users who reside in other domains, you must modify the recipient scope.
To modify the recipient scope
- Start the Exchange 2007 Management Console.
- Expand Recipient Configuration.
- Right-click the Recipient Configuration object, and then click Modify Recipient Scope.
- Click to select the Recipient Domain Controller check box, click Browse to locate a domain controller in the appropriate child domain, and then click OK.
- Click OK.
Users Cannot Log On to Outlook Web Access Because of Insufficient User Rights
Procedure
- Open the Active Directory Users and Computers snap-in.
- On the View menu, click Advanced Features.
- Open the properties of a user who cannot log on to Outlook Web Access.
- Click the Security tab, and then click Advanced.
- Select the Allow inheritable permissions check box if it has not already been selected.
- Repeat steps 3 through 5 for each organizational unit between the user object and the top-level container.
- Allow time for replication to occur.
- Open the Active Directory Users and Computers snap-in.
- On the View menu, click Advanced Features.
- Open the properties of the top-level container in the domain of the users who cannot log on.
- Click the Security tab.
- Verify that the Exchange Servers group appears in the Group or user names list. Add this group if it does not appear in the list. You do not have to set permissions for the Exchange Servers group.
Scheduling Assistant Does Not Give Suggested Times
The Scheduling Assistant in Microsoft Exchange Server 2007 helps users schedule meetings in Microsoft Office Outlook 2007 and Office Outlook Web Access. The Scheduling Assistant provides visual guidance about the best and worst dates and times to schedule a meeting based on who is invited to the meeting and what resources are required. However, the Scheduling Assistant is limited to 100 attendees and will not display suggest times if the number of attendees for a meeting exceeds 100.
This issue occurs if the following conditions are true:
- The mailbox is located on a computer that is running Exchange 2007.
- The user is using Outlook 2007 or Outlook Web Access.
In Outlook 2007, when a meeting includes more than 100 attendees, the Suggested Times area contains the following message: Suggestions are not provided because there are too many attendees.
In Outlook Web Access, when a meeting includes more than 100 attendees, the following message will appear at the top of the Scheduling Assistant: Free/busy information and suggestions cannot be provided for more than 100 attendees.
This is not a configurable setting. The only way to avoid this warning is to invite fewer than 100 attendees.
Cannot Open an Excel Attachment in Outlook Web Access
Assume that the following conditions are true:
- You receive an e-mail message that contains an Office Excel 2007 file attachment.
- You use double-byte character set encoding to name the file attachment. For example, the file name uses characters from the Korean, Japanese, or Chinese character set.
- The file name is 13 characters or longer.
In this scenario, you experience the following symptoms:
- When you try to open the attachment in Outlook Web Access, the file does not open.
- When you save the file to the hard disk drive, the file is not saved with the original file name. Instead, the file is saved with a long string of characters. For example, the file is saved with a name that resembles the following:
%ed%95%9c%eb%91%98%ec%85%8b%eb%84%b7%eb%8b%a4%ec%97%ac%ec%9d%bc%ec%97%ac%ec%95%84%ec%97%b4%ed%95%98%eb%91%98(1).xlsx
This issue occurs when you use Windows Internet Explorer 7 or an earlier version of Internet Explorer to access Outlook Web Access. This issue occurs because of a limitation in Internet Explorer 7 and in earlier versions of Internet Explorer.
To work around this issue, use one of the following methods:
- Use Internet Explorer 8 to access Outlook Web Access. Internet Explorer 8 supports opening file names of up to 2,083 UTF-8 encoded characters.
- Ask the sender to rename the Excel attachment using a shorter file name and then to resend it. For example, ask the sender to use a file name that is less than thirteen double-byte character set characters.
The Microsoft Exchange System Attendant Service Does Not Start
This topic describes how to resolve a problem that occurs when the Microsoft Exchange System Attendant service does not start on a computer that is running Microsoft Exchange Server 2007. To resolve this problem, you must use the ADSI Edit tool to modify the permissions on the Schema partition.
This issue may occur when the Schema partition has incorrect permissions for the Authenticated Users group.
To resolve this issue, follow these steps:
- Start the ADSI Edit tool. To do this, click Start, click Run, type adsiedit.msc, and then click OK.
By default, the ADSI Edit tool is installed in Windows Server 2008. In Windows Server 2003, the ADSI Edit tool is included with the Windows Support Tools. To install the Windows Support Tools, double-click Supptools.msi in the Support\Tools folder on the Windows Server 2003 CD.
|
- Connect to a domain controller. To do this, follow these steps:
- Click ADSI Edit in the navigation pane.
- In the Actions pane, click More Actions, and then click Connect to.
- In the Connection Settings dialog box, click Select a well known Naming Context, click Configuration in the Select a well known Naming Context list, and then click OK.
- Expand the following path:
- Configuration [<domainController>.contoso.com]
- CN=Configuration,DC=contoso,DC=com
- CN=Partitions
- In the details pane, right-click CN=Enterprise Schema, and then click Properties.
- Click the Security tab, and then click Authenticated Users.
- Configure the following permission settings:
Permission entry
|
Permission option
|
Read
|
Allow
|
List contents
|
Allow
|
Read all properties
|
Allow
|
Read permissions
|
Allow
|
- To configure these settings, follow these steps:
- Click to clear all the check boxes.
- Click to select the Read check box in the Allow column.
- Click Advanced.
- In the Permission entries list, click Authenticated Users, and then click Edit.
- Click to clear all the check boxes, and then click to select the following check boxes:
List contents: Allow
Read all properties: Allow
Read permissions: Allow - Click OK three times.
- Exit the ADSI Edit tool.
The Exchange POP3 Service or the Exchange Transport Service Does Not Restart
This topic explains how to troubleshoot an issue in which the Microsoft Exchange POP3 service or the Microsoft Exchange Transport service on an Exchange Server 2007 Hub server does not start.
When you try to restart the Microsoft Exchange POP3 service or the Microsoft Exchange Transport service on an Exchange 2007 Hub server, the services do not start. One or more of the following error events may be logged in Event Viewer:
Event Source: MSExchange POP3 service
Event Category: ProcessManager
Event ID: 1019
Description:
Failed to start listening (Error: 10049). Binding: <IP address>:110.
|
Event Source: MSExchange TransportService
Event Category: ProcessManager
Event ID: 1019
Description:
Failed to start listening (Error: 10049). Binding: <IP address>:25.
|
The Microsoft Exchange Transport service can be started in Exchange 2007 SP1 even if event ID 1019 is logged.
|
This issue occurs if the POP3 service is not configured to listen on a local IP address or if the receive connectors for the Transport service cannot bind to an IP address. To resolve this issue, configure the POP3 service to listen on a local IP address, and configure the receive connector to listen on all IP addresses.
To configure the POP3 service to listen on a local IP address
- Start Exchange Management Shell.
- Run the following cmdlet, and then press ENTER:
set-popsettings -unencryptedortlsbindings "0.0.0.0:110" -sslbindings "0.0.0.0:995"
- Close Exchange Management Shell.
To configure a receive connector to listen on all IP addresses
- Start Exchange Management Console.
- Expand Server Configuration, and then click Hub Transport.
- Select Receive Connector, and then click Properties.
- On the Network tab, in the Use these local IP addresses to receive mail box, remove the IP address that the receive connector cannot bind to.
- Click Add, click Use all IP addresses available on this server, and then click OK.
- Click OK, and then close Exchange Management Console.
Troubleshooting Mail Flow Issues due to Mailbox Logon Failure
This topic provides information about how to troubleshoot Microsoft Exchange Server 2007 mail flow issues due to mailbox logon failure. The following symptoms are sometimes an indication of this failure:
- Inbound mail flow is stuck in the queue with the following error message:
430 4.2.0 STOREDRV; mailbox logon failure - When you use Microsoft Outlook to send e-mail messages to local recipients, the e-mail messages are sent and appear in the Sent Items folder, but e-mail recipients never receive your e-mail messages. You also cannot track these messages by using the Message Tracking tool.
- On an Exchange 2007 Mailbox server, you may find Event ID 1009 in the Application log:
The Microsoft Exchange Mail Submission service is currently unable to contact any Hub Transport servers in the local Active Directory site. The servers may be too busy to accept new connections at this time.
This issue occurs when the Microsoft Exchange Transport service is configured to log on using another account, instead of the Network Service account. For example, the Microsoft Exchange Transport service is configured to log on using the Administrator account.
To resolve the problem, change the logon account back to the Network Service account.
Procedure
- On the Exchange 2007 Hub Transport server, click Start, click Run, type Services.msc, and then click OK.
- In the list of services, right-click Microsoft Exchange Transport, and then click Properties.
- Click the Log On tab, and then click This account.
- Click Browse, type Network Service, click Check Names, and then click OK.
- Remove the password from the Password and Confirm Password edit boxes.
Microsoft Windows automatically generates a password for the Network Service account. Therefore, you do not have to specify a password for this account.
|
- Click OK. Then restart the Microsoft Exchange Transport service.
Troubleshooting Message Delivery Failures in Exchange 2007
This topic describes troubleshooting steps for message delivery failures in Microsoft Exchange Server 2007.
- To determine where message delivery failed or where the non-delivery report (NDR) is being generated, perform one or more of the following steps:
- Use the Mail Flow Troubleshooter tool. The tool provides easy access to various data sources that are required to troubleshoot problems with mail flow, such as NDRs, queue backups, and slow deliveries. The tool then automatically diagnoses the retrieved data, presents an analysis of the possible root causes, and suggests corrective actions.
- Use the Queue Viewer on a Hub Transport server or Edge Transport server to determine where message delivery failed. For example, the message may be in a delivery queue that has a status of Retry, or in the Unreachable queue.
- Check the NDR to verify the delivery status notification (DSN) codes, and to determine which server and component are generating the NDR.
- Use the Test-ServiceHealth cmdlet in the Exchange Management Shell to verify that all the required Exchange services are running on the transport server where message delivery failed or on the transport server that generated the NDR.
- Verify that the hard disk drive that holds the message queue database has enough free disk space. By default, the message queue database is stored at <Exchange Installation Drive>\Program Files\Microsoft\ExchangeServer\TransportRoles\data\Queue. This location is controlled by the QueueDatabasePath parameter in the EdgeTransport.exe.config application configuration file.
By default, in the release to manufacturing (RTM) version of Exchange 2007, the hard disk drive that holds the message queue database must have at least 4 GB of free space.
By default, in Exchange 2007 Service Pack 1 (SP1), the hard disk drive that holds the message queue database must have at least 500 MB of free space.
If the free space does not meet the minimum threshold, all mail delivery stops.
- Verify that the necessary connectors are enabled and configured appropriately on the transport server where message delivery failed, or on the transport server that generated the NDR.
- Check Windows Event Viewer to see the events that are in the application event log on the Hub Transport servers, Edge Transport servers, or Mailbox server that are involved in the delivery of the message. You can increase logging levels on the Exchange processes that are generating errors.
- Check the DSN error codes that are contained in the NDR. The error codes can be useful to help determine the source of the problem. For example, an error code might point to a problem with the domain name system (DNS) service or with network connectivity.
- Use Active Directory Service Interfaces (ADSI) Edit to verify that the following list of Active Directory attribute values are correct for the recipient object:
- Legacyexchangedn
- Homemdb
- Homemta
- mailNickname
- proxyAddresses
- msExchHomeServerName
- msExchMailboxSecurityDescriptor
- msExchMailboxGuid
You must check the recipient object attribute values on the same global catalog server that is being used by the transport server where message delivery has failed. You can find the global catalog server that is being used by a transport server in the transport server properties in the Exchange Management Console.
|
- Compare the Active Directory attribute values for the recipient object that you obtained in step 7 with the recipient object attributes on the global catalog server that is referenced by the Mailbox server that contains the recipient's mailbox. If any of the values don't match, perform one or more of the following steps:
- Verify that replication is working between global catalog servers.
You can use the Nslookup.exe command to test your DNS configuration. DNS configuration problems are frequently the cause of replication problems.
|
- If there are any servers that are running Exchange Server 2003 or Exchange 2000 Server in your organization, verify that the appropriate routing group connectors and bridgehead servers are functioning correctly.
No comments:
Post a Comment